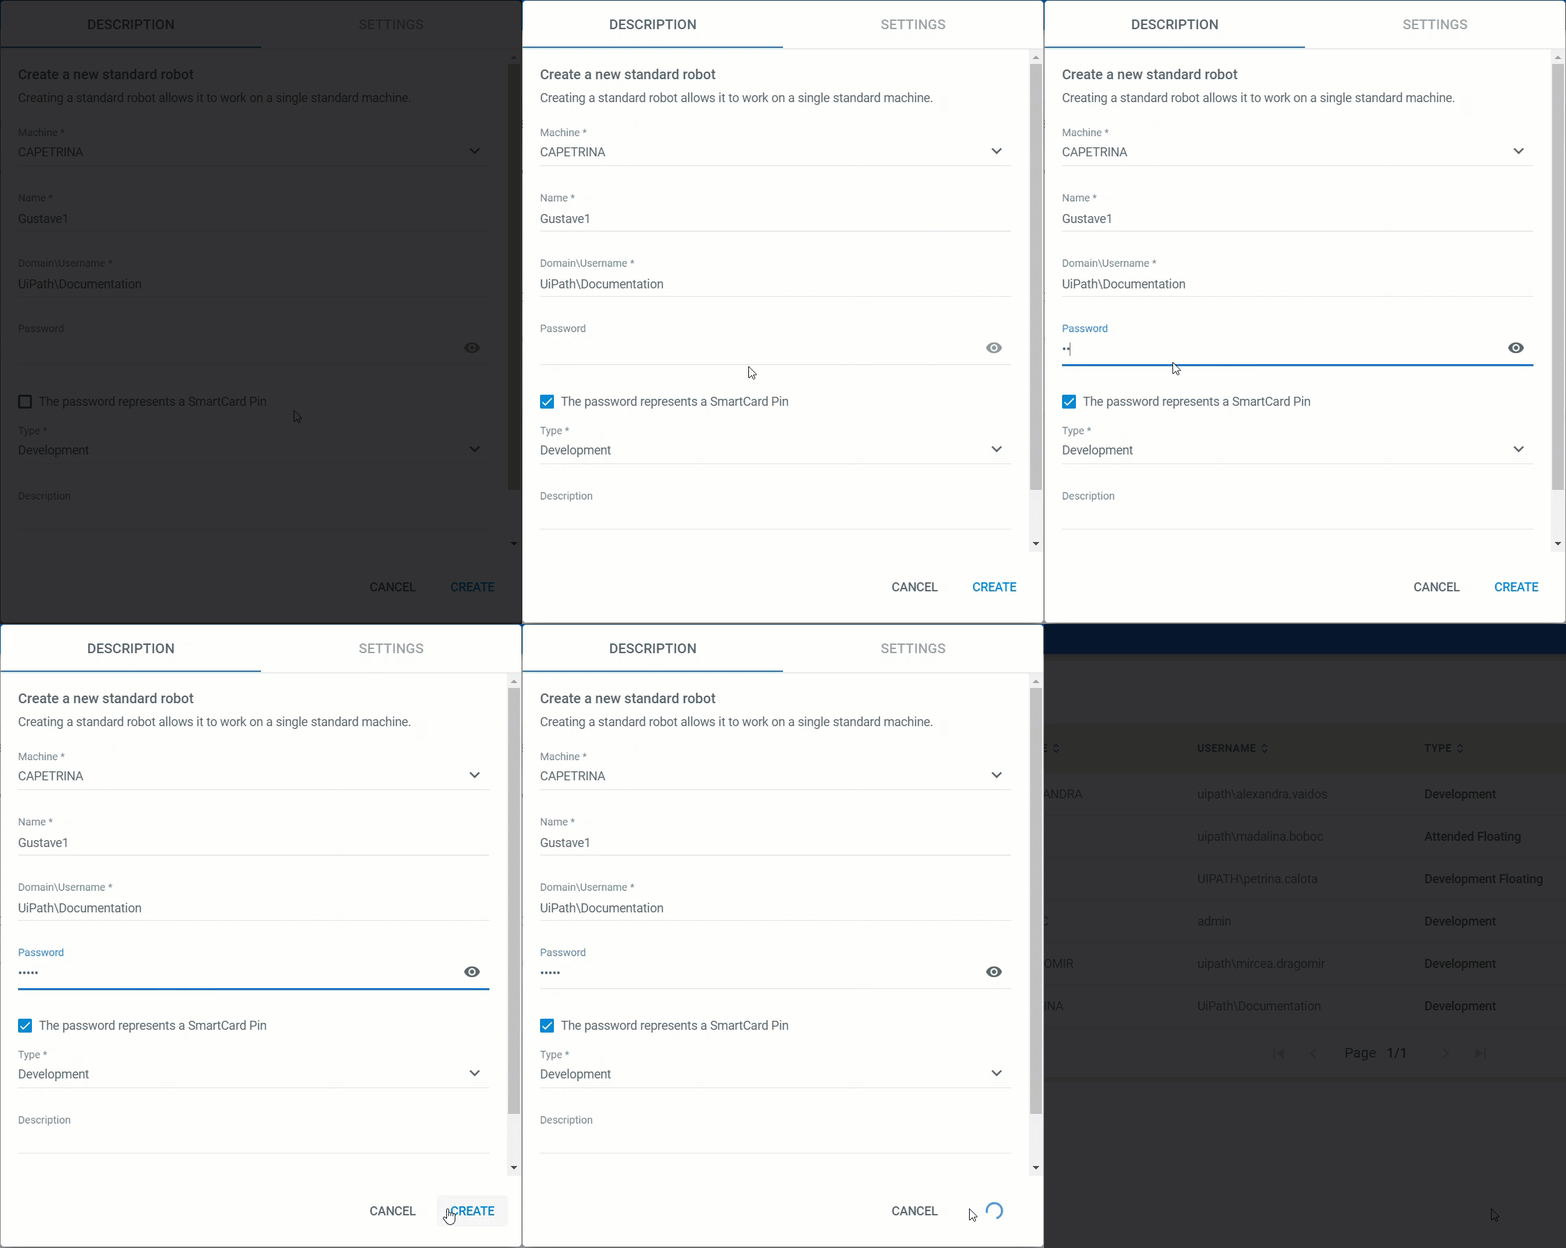
When you create a Robot, you can use two methods to authenticate the Robot:
- Through the set of Username and Password credentials.
- Through SmartCards (Common Access Cards or Personal Identity Verification cards).
In this regard, the Features.SmartCardAuthentication.Enabled parameter has been added to the web.config file from Orchestrator. The following values are available:
True- Displays the The password represents a SmartCard Pin check box on the Create a New Standard Robot and Create a New Floating Robot windows, thus giving you the possibility to authenticate your Robots using the SmartCard Pin.False- No SmartCard-pertaining option is available. This is the default value.
To authenticate a Robot via SmartCard, select the The password represents a SmartCard Pin check box. This can be done both when creating a Robot or when editing one.

Important
This feature only works if the Login to Console option on the Settings tab is set to True.
SmartCard authentication is compatible with Unattended, Development and NonProduction Robots. However, since no password is needed for Attended Robots, neither is SmartCard authentication.
Both virtual and physical cards can be used for authentication, as long as they are part of a single Active Directory domain. The corresponding user must belong to the same domain.
Important
Virtual card authentication is only possible on Windows 8.1 and above.
A SmartCard has a unique Pin. Multiple users can be registered to a card, in which case all users have the same Pin. A user can also be registered to multiple cards, in which case multiple Pin numbers are used for the same user.
Please note that the SmartCard needs to be inserted in the smart card reader with every authentication. As long as the SmartCard is inserted, the associated Robot is available on the corresponding machine.
Important
Simultaneous process execution with Robots registered with the same username but different authentication methods is NOT supported.
It is highly recommended to consult your company’s password policy before using the SmartCard authentication method. Credentials for a Robot which authenticates with a SmartCard may be stored in either the SQL Server or CyberArk. Find out more about storing Robot credentials in CyberArk here.
SmartCard Authentication on New Robots
Standard Robot
- Create a Standard Robot in Orchestrator.
- After filling the Domain\Username, check The password represents a SmartCard Pin option. This allows you to use your SmartCard Pin as a password.
- Fill in the Password field with the corresponding SmartCard Pin.
- Choose the Robot Type from the drop-down list. Please note that Attended Robots to not support SmartCard authentication. For more information, see About Robots.
- (Optional) Add a description for the Robot. We recommend populating this field, especially when dealing with an environment with many robots.
- Click the Create button. The Robot is now displayed on the Robots page and provisioned to Orchestrator. It now authenticates with the SmartCard for the corresponding user.
Floating Robot
- Create a Floating Robot in Orchestrator.
- After filling the Domain\Username, check The password represents a SmartCard Pin. This allows you to use your SmartCard Pin as a password.
- Fill in the Password field with the corresponding SmartCard Pin.
- Make sure to choose the Development Robot Type from the drop-down list. Please note that Attended Robots to not support SmartCard authentication. For more information, see About Robots.
- (Optional) Add a description for the Robot. We recommend populating this field, especially when dealing with an environment with many robots.
- Click the Create button. The Robot is now displayed on the Robots page and provisioned to Orchestrator. It now authenticates with the SmartCard for the corresponding user.
Changing the Authentication Method
Regular to SmartCard
To change the authentication method of an existing Standard or Floating Robot from regular to SmartCard, do the following:
- Access the Robots page in Orchestrator.
- Click the Edit button on the target Robot. The Edit Robot page is displayed.
- Check The password represents a SmartCard Pin. This clears the Password field so that you can provide the corresponding SmartCard Pin.
- Fill in the Password field with the corresponding SmartCard Pin.
- Click the Update button. Your changes are now saved and the Robot now authenticates via SmartCard.
Note:
You cannot change the authentication method to SmartCard for Attended Robots.
SmartCard to Regular
To change the authentication method of an existing Standard or Floating Robot from SmartCard to regular, do the following:
- Access the Robots page in Orchestrator.
- Click the Edit button on the target Robot. The Edit Robot page is displayed.
- Clear The password represents a SmartCard Pin. This clears the Password field so that you can provide the corresponding password.
- (Optional) Add the Windows password for the specified username.
- Click the Update button. Your changes are now saved and the Robot now authenticates via the username/password credential set.
Updated 2 years ago