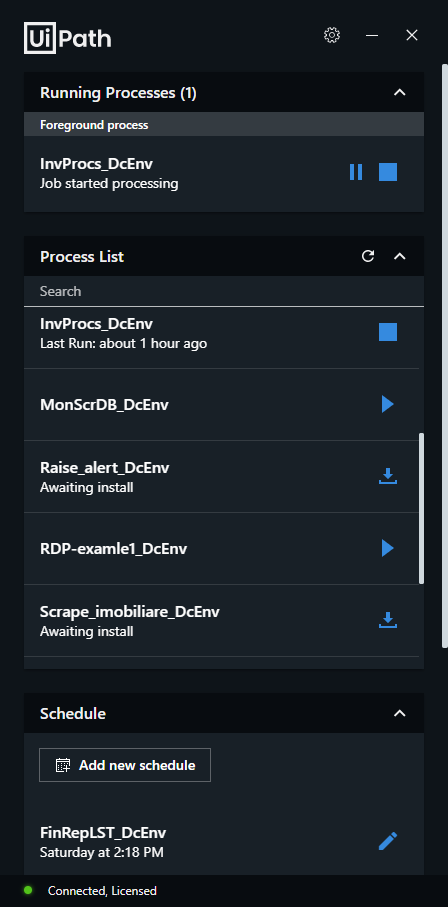
Agent Desktop is the center of all your attended automation needs. It is an application which allows you to view, manage, and schedule jobs. As a client of the Robot Service, it can request to start or stop jobs and change settings, based on user input.
Although it is specially designed for attended use, Agent Desktop doesn't impose any limits as to what processes you can start. This means that you're able to easily connect to Orchestrator and have jobs started from there.
The type of Robot agent is chosen during installation. Agent Desktop does not completely replace the Robot Tray, but you can only use one or the other. The Robot Service deployment is not affected by the type of Robot Agent you use.

After you install and run the Robot, an icon ![]() is displayed in the system tray. Clicking this icon brings Agent Desktop into focus, while right-clicking it brings up a menu from which you can access the Settings, the Orchestrator Settings, or to quit. If the User Mode Robot is installed, closing Agent Desktop also closes the Robot Service. If the Service Mode Robot is installed, closing Agent Desktop does not close the Robot Service.
is displayed in the system tray. Clicking this icon brings Agent Desktop into focus, while right-clicking it brings up a menu from which you can access the Settings, the Orchestrator Settings, or to quit. If the User Mode Robot is installed, closing Agent Desktop also closes the Robot Service. If the Service Mode Robot is installed, closing Agent Desktop does not close the Robot Service.
The Agent Desktop system tray icon color indicates its connection status with Orchestrator, as follows:
 - when the connection is established.
 - when not connected.
 - when an error is encountered, such as the UiPath Robot service being stopped.
The connection status with Orchestrator can also be viewed by hovering over the tray icon, or in the Agent Desktop status bar, as follows:
- Connected, licensed - when a Robot exists and is licensed. The following tooltip message is displayed on mouse hover:
"Robot is connected and license is acquired.". - Connected, unlicensed - when a Robot exists, but is not licensed. The following tooltip message is displayed on mouse hover:
"There are no available licenses on the server.". - Robot unavailable - this status is displayed along with one of the following tooltip messages on mouse hover, in the following cases:
"An Orchestrator Robot definition must exist for this user."- if a Machine that hosts the Robot is not defined on Orchestrator. For example, if you deployed your Robots using theConnectionStringwithout first defining the Robots in Orchestrator.“Robot does not exist.”- when no Robot is defined.“There are no available licenses on the server.”- currently, all the available licenses in Orchestrator are consumed.“Robot already connected to machine ‘Machine_Name’.”- a floating Robot is already in use on a different machine."The machine key is linked to another machine!"- the key you used to connect to Orchestrator belongs to another machine in Orchestrator.
For more information, see the Field Descriptions for Agent Desktop.
The Agent Desktop main window is made up of the following expandable widgets:
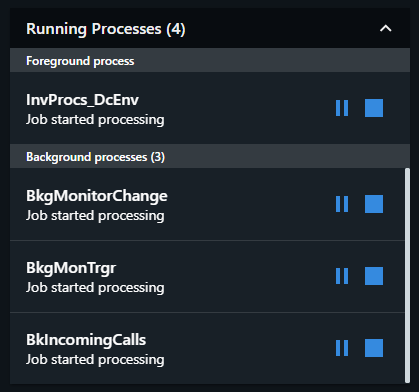
The Running Processes Widget
The Running Processes widget enables you to:
- View all currently running foreground and background processes.
- Pause, resume, or stop a process. The Pause button can be disabled for a process from the Studio Process Settings window. Once a process is started, the execution status is displayed. You can use the Report Status activity to have custom status messages displayed during execution.

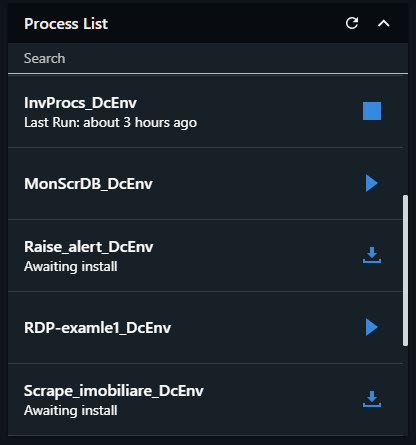
The Process List Widget
The Process List widget enables you to:
- View all the available automation processes:
- If Agent Desktop is connected to Orchestrator, processes from the environments and folders the Robot is a part of are displayed. Hovering over a process displays its name and the Orchestrator folder it's in.
- If Agent Desktop is not connected to Orchestrator, processes from the
%ProgramData%\UiPath\Packagesfolder are displayed. ThePackagesfolder can be specified, as explained on this page.
- Start or stop a process. It can be paused from the Running Processes widget.
- Download processes that have a newer version available, or that need to be downloaded and unpacked locally, and view the installation status.
- Search for available processes.

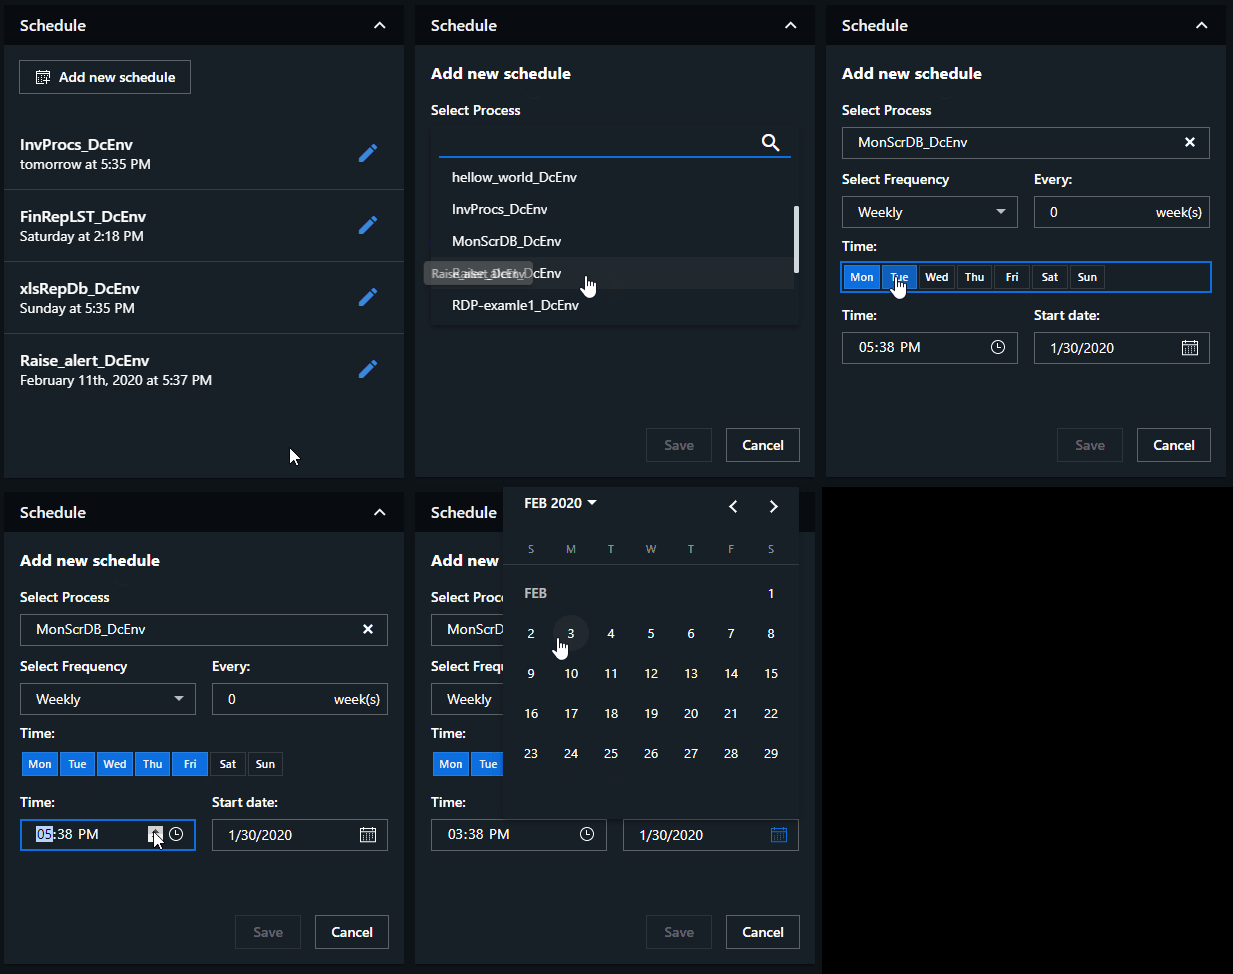
The Schedule Widget
The Schedule widget enables you to specify a time or period in which a selected process is executed. Any process which is visible in the Process List widget can be set to a schedule. Frequency can be set to once, daily, weekly, or monthly, each with its own date settings to configure. A schedule can only include one process. Clicking the Edit schedule button allows you to make changes to it, or even remove it.

A reminder is displayed once a scheduled process is about to start. Please note that a scheduled process does not start without your consent. The reminder window allows you to Snooze (displays the reminder again in 10 minutes), Dismiss, or Start the process.

Updated 2 years ago