Important:
Updating Google Chrome from version 72 to version 73 causes the Chrome extension installation to fail! Find out more in the troubleshooting guide for Studio.
The Chrome extension is bundled in the Studio setup. It is possible to install it even with no Internet access. The extension is installed globally if Google Chrome is installed system-wide, and per user if the browser is also installed this way. Please note that you may be asked to close Google Chrome while installing the extension, so be sure to save any pending work.
Note:
It is recommended to close all Chrome instances before installing the extension.
From the Studio Installer
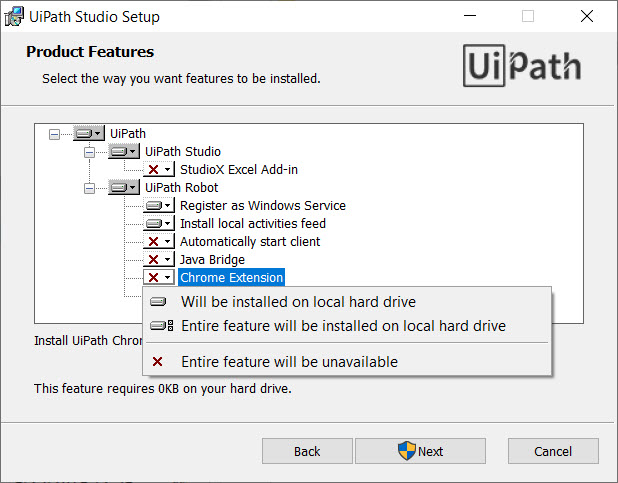
- Run the Studio Installer and click Advanced in the License Agreement section. The Product Features window is displayed.
- Click the Chrome Extension drop-down and choose to install this feature.
- Click Next. Studio setup continues while also installing the Chrome extension.
From UiPath StudioX
- Access the Tools page from the Backstage View. The extensions you can install become visible.
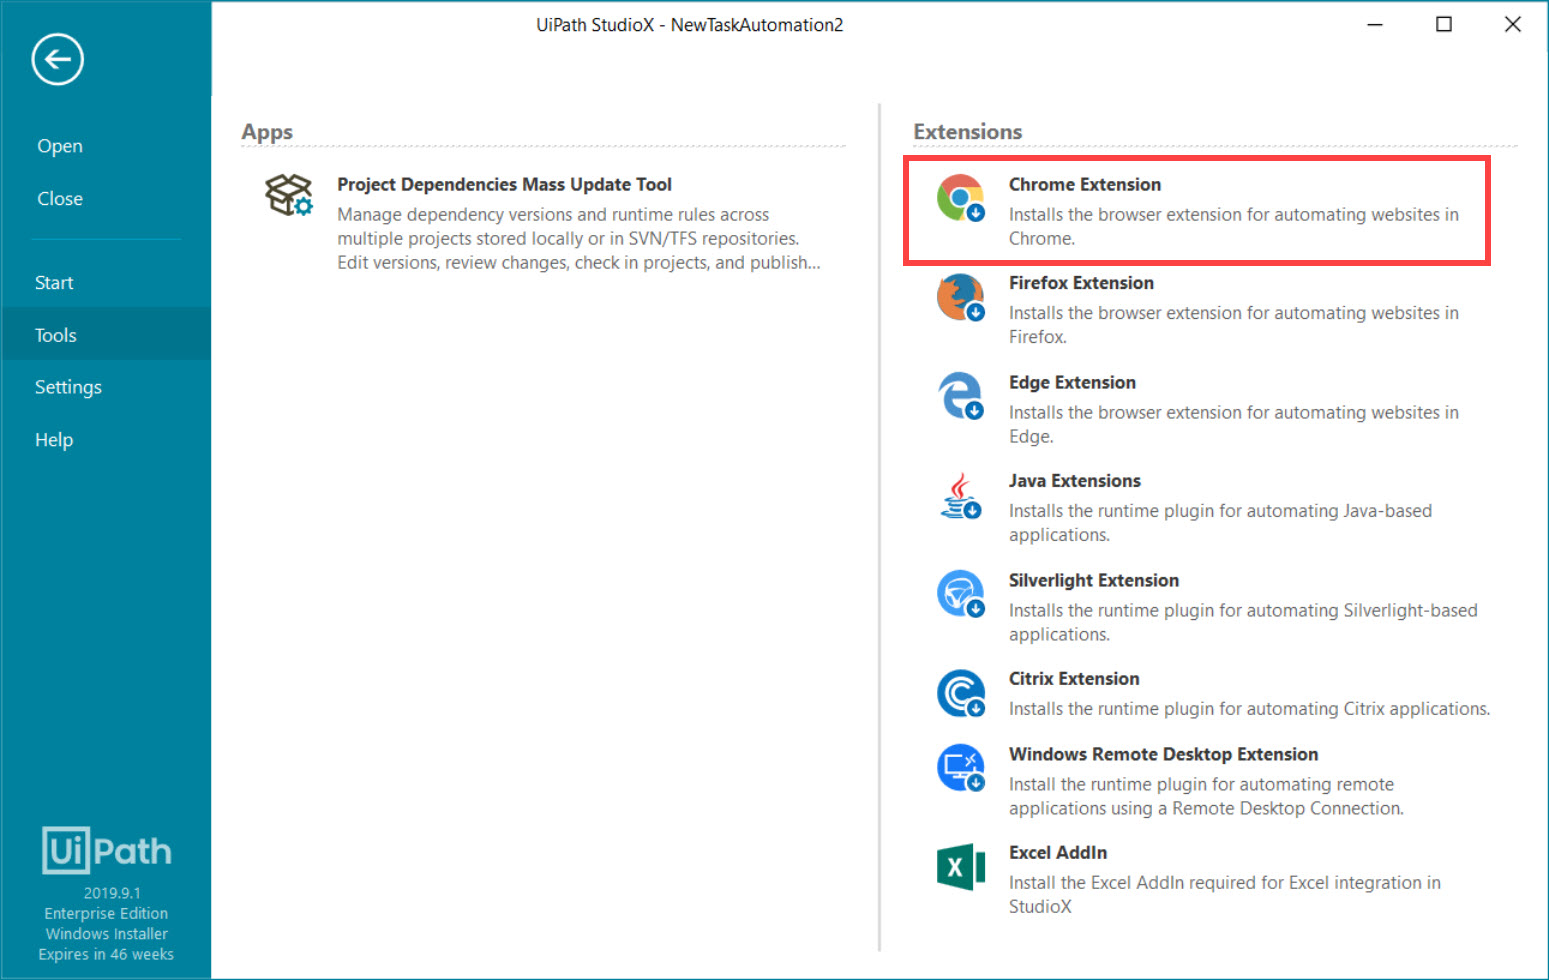
- Click the Chrome Extension button. A confirmation dialog box is displayed.
- Open Google Chrome and click the Enable extension button. The extension is now installed and activated.
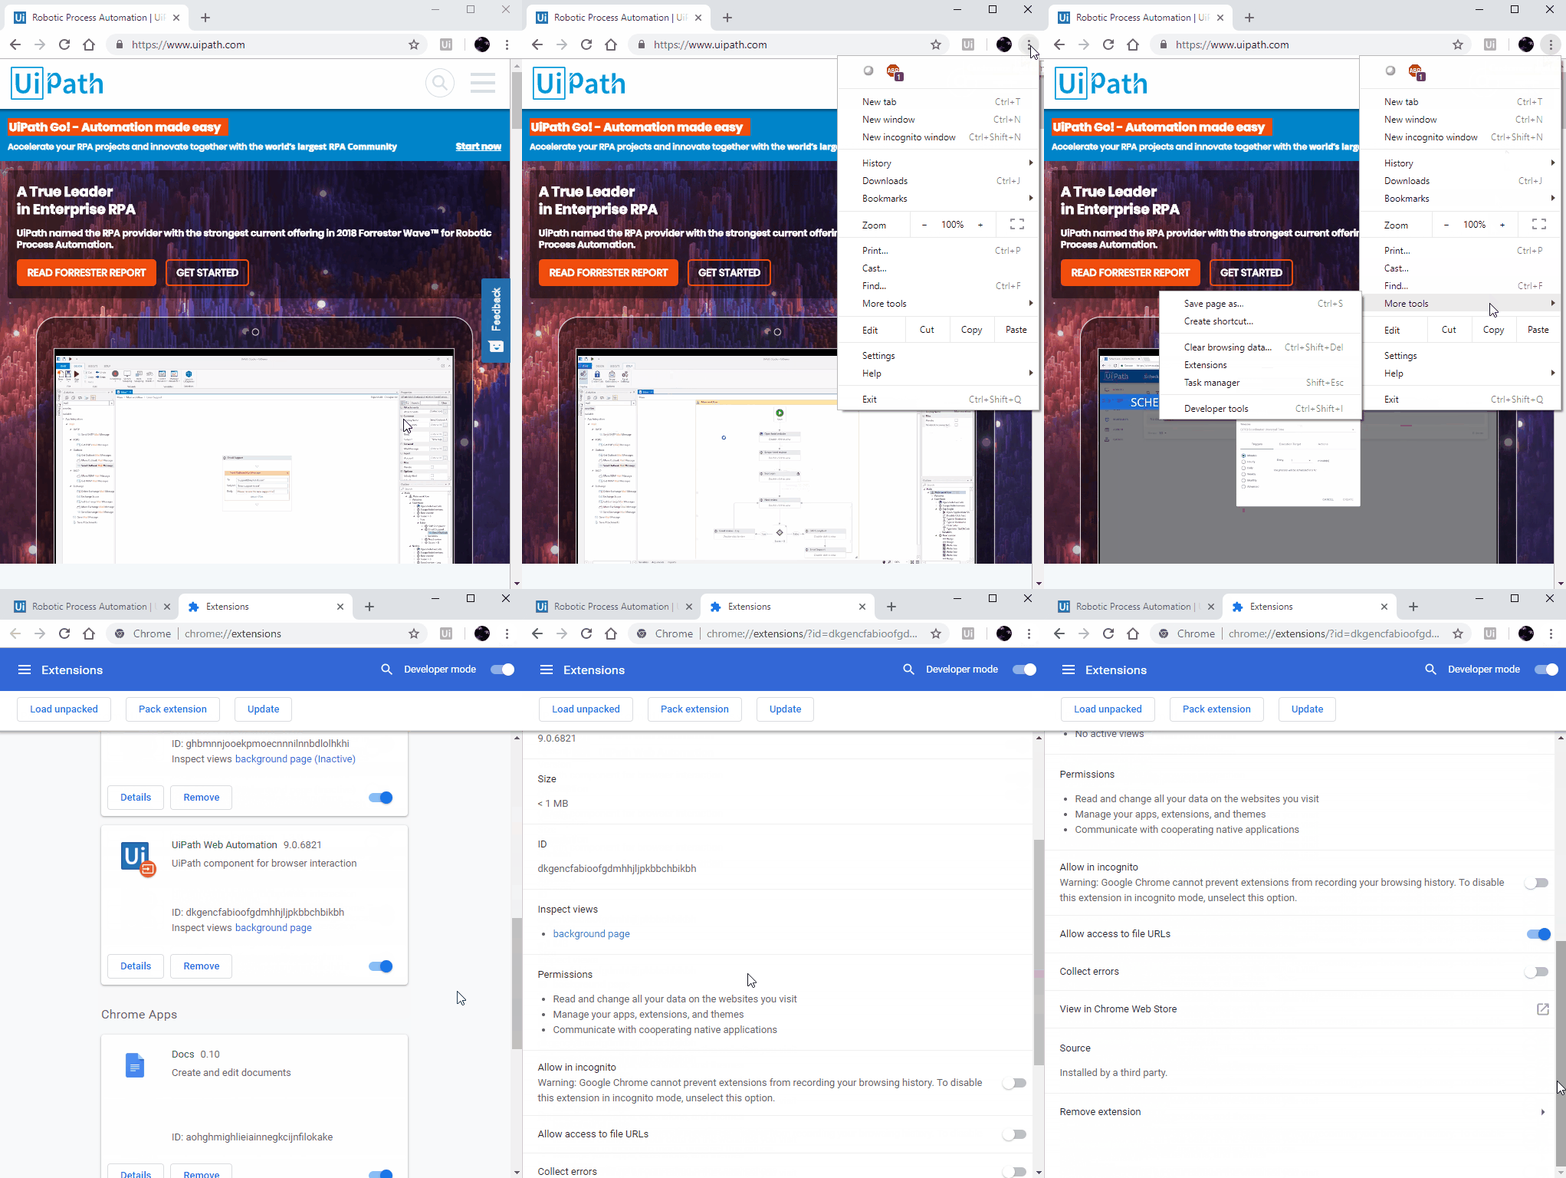
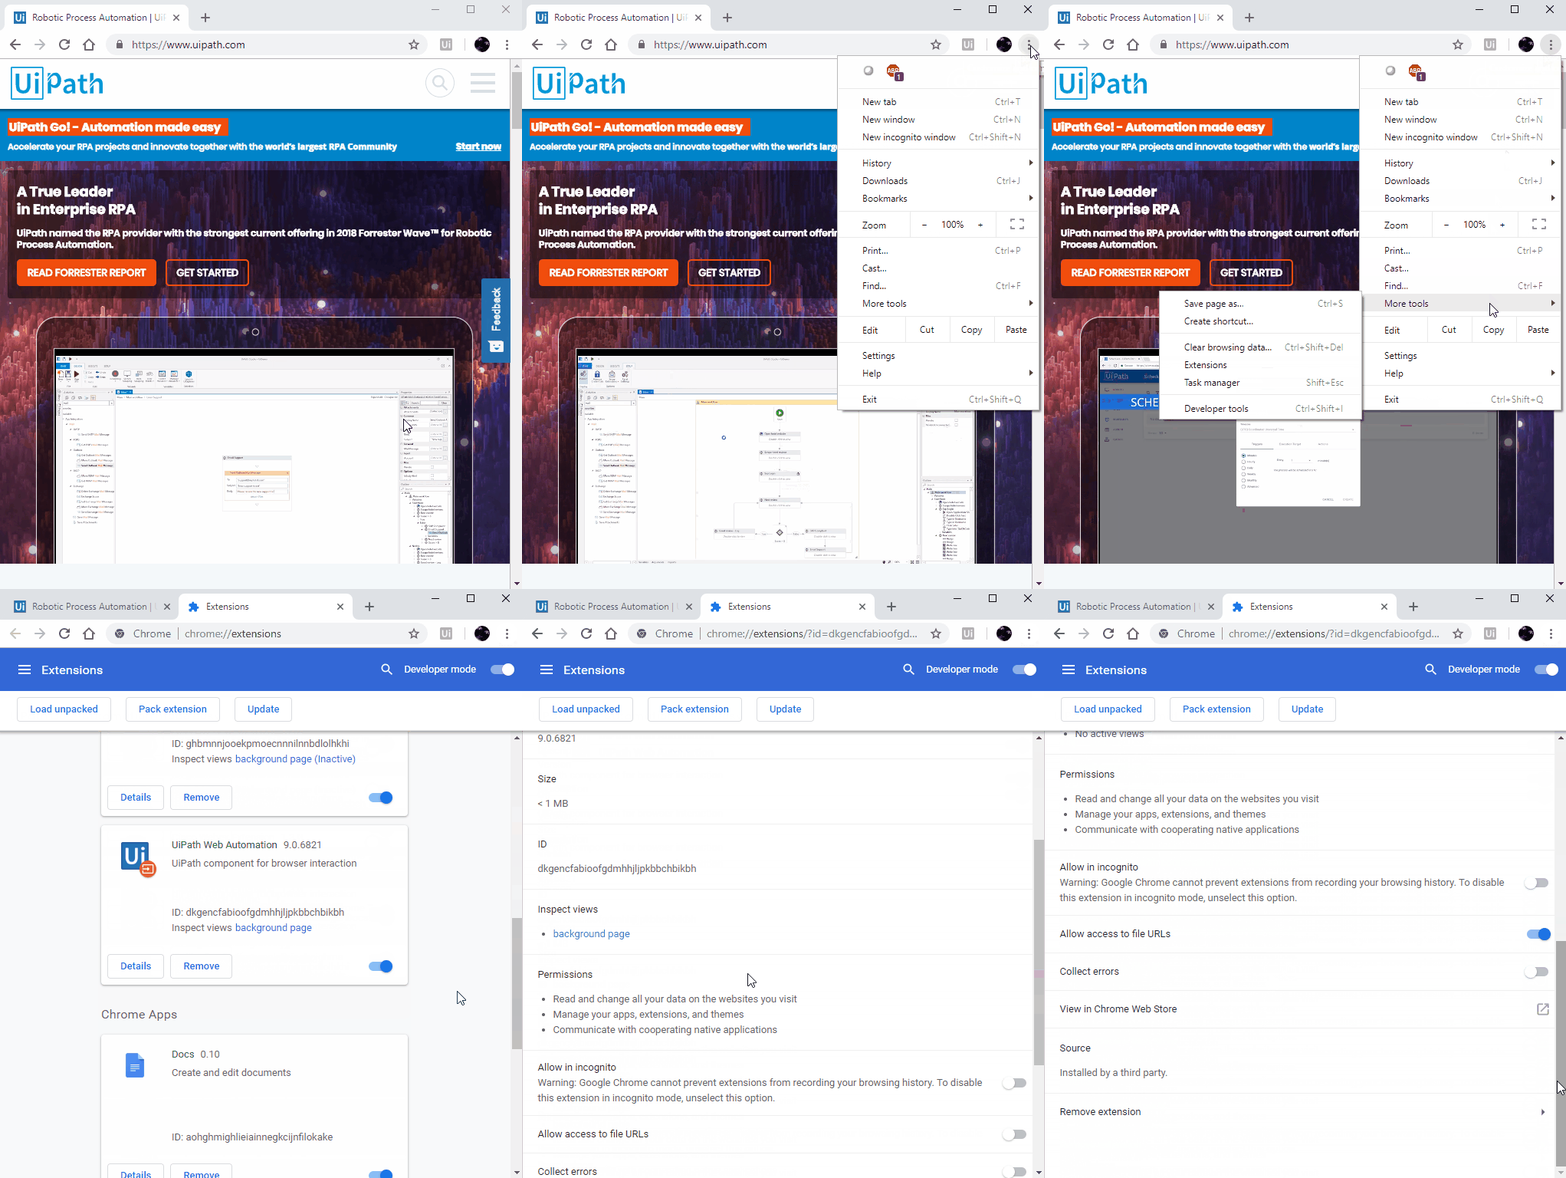
Please note that file access is disabled by default. To enable it:
- Click the Side Navigation Bar
> More Tools > Extensions. The
chrome://extensions/page is displayed. - In the
chrome://extensions/page, navigate to the UiPath extension. - Click the Details button. The UiPath Chrome extension details page is displayed.
- On this page, select the Allow access to file URLs check box.
From the Command Prompt
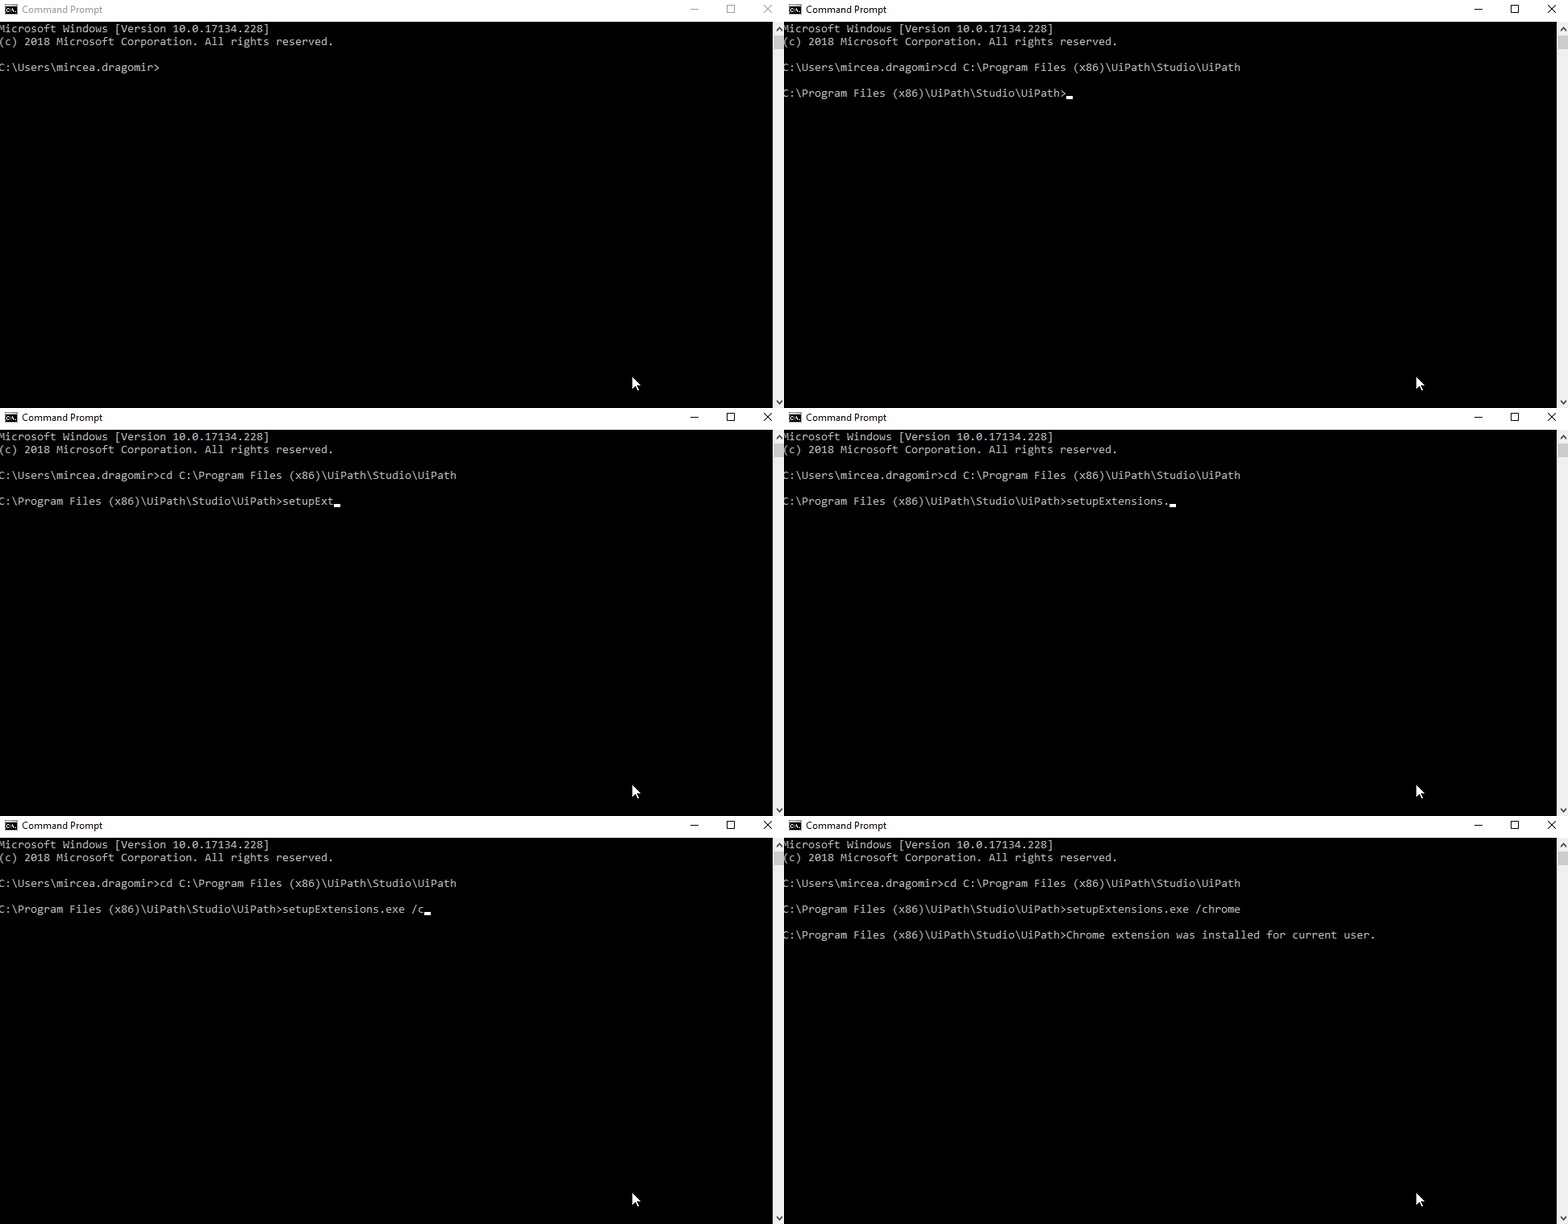
- Click the Windows Start button and type
cmdin the search field. - Right click on Command Prompt and run it as administrator.
- Change the directory to the UiPath installation folder (
cd C:\Program Files (x86)\UiPath\Studio\UiPath). - Use the
SetupExtensions.execommand to run the corresponding file, and use one of the following arguments:/chromeglobal- installs the UiPath Chrome extension per system./chrome- repairs the UiPath Chrome extension per system if available. Otherwise it installs the it per user.
- Open Google Chrome and click the Add extension button. The extension is now installed.
Please note that file access is disabled by default. To enable it:
- Click the Side Navigation Bar
> More Tools > Extensions. The
chrome://extensions/page is displayed. - In the
chrome://extensions/page, navigate to the UiPath extension. - Click the Details button. The UiPath Chrome extension details page is displayed.
- On this page, select the Allow access to file URLs check box.
As of 2018.3, installing the Chrome extension does not remove older versions. This does not interfere with your new or old automation projects. You can choose the Chrome extension to activate from the chrome://extensions/ page by simply clicking the Toggle Switch button of the corresponding extension.
Updated 2 years ago
See Also
| Installing the Firefox Extension |