Renewing or Updating Your License
- In Orchestrator, navigate to the License page at tenant level or host level. The License page is displayed.
- Click Update. A dialog window is displayed, prompting How would you like to update your license?.
a. If your Orchestrator instance has internet access, select Online. The renewal is processed automatically.
b. If your Orchestrator instance does not have internet access, select Offline and follow the steps for offline activation.
Important
You can only change your host license with a new one if the number of used licenses is equal or lower than that provided by the new license. For example, I have a license for 20 Attended Robots and all of them are distributed to my tenants. If I want to switch to a license for 10 Attended Robots, I am required to remove the licenses for at least 10 of my Robots in order to be able to upload the new license.
Deactivating Your License
- In Orchestrator, navigate to the License page at tenant level or host level. The License page is displayed.
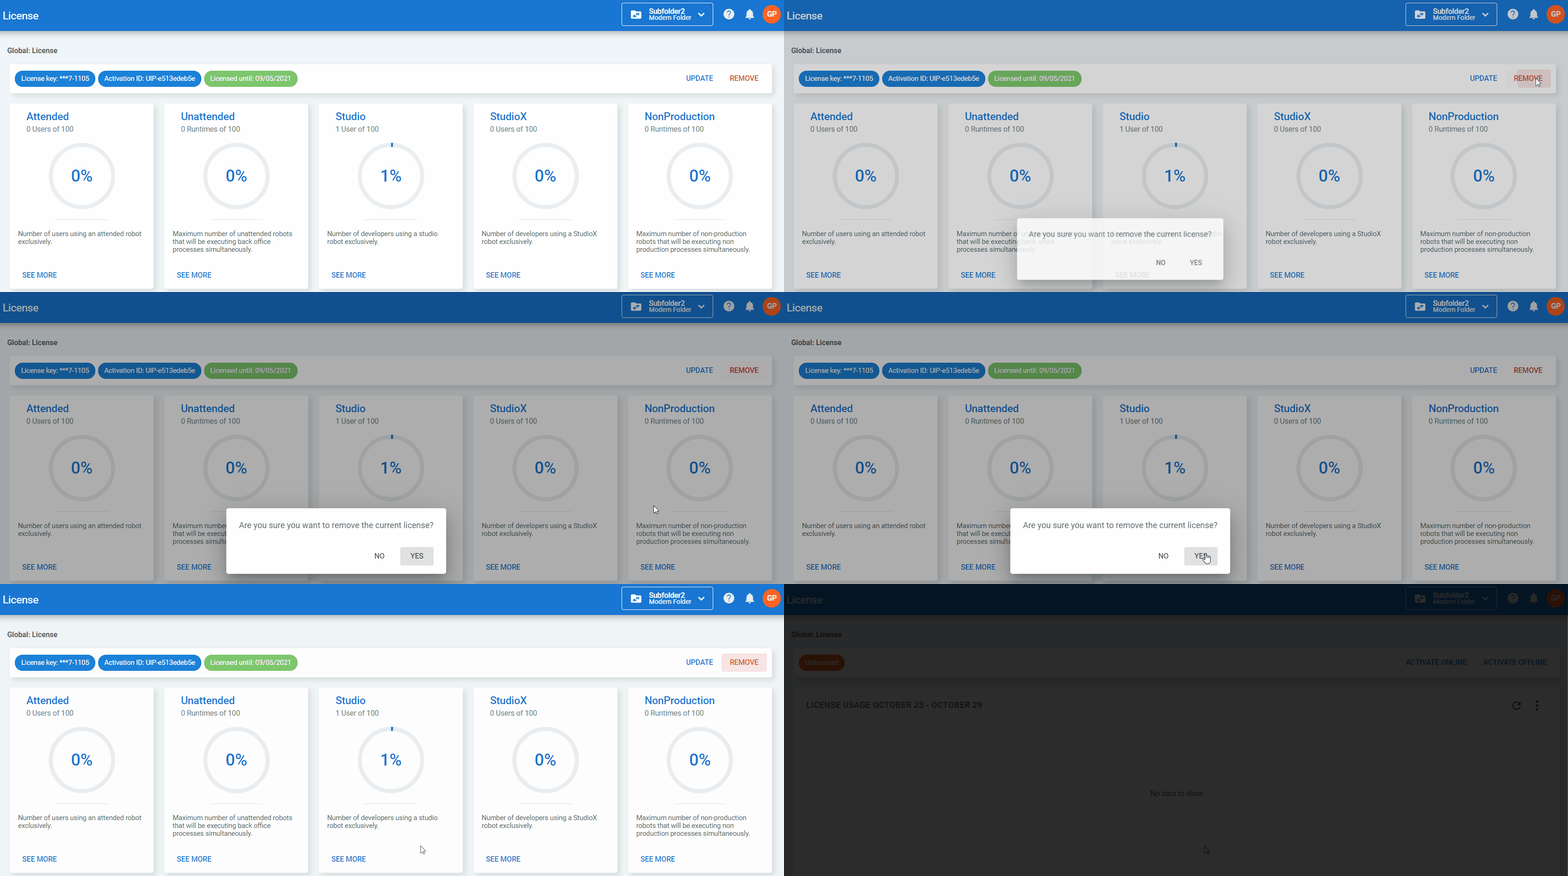
- Click Remove. A warning dialog is displayed prompting you to confirm the removal.
- Click Yes.
- If your Orchestrator instance has internet access, the removal is processed automatically, Orchestrator returns to an unlicensed state and the license key activation is removed. Skip the remaining steps.
- If your Orchestrator instance does not have internet access, the Deactivate Offline window is displayed. Continue with the next step.
- Use the Download button to save a copy of the deactivation file.
- From any computer with an internet connection, navigate to the Activation Portal. Click Deactivate Your License.
- Use the Upload From File button to upload the deactivation file.
- Click the Deactivate License button. Deactivation is complete, your Orchestrator is returned to an unlicensed state and the license key activation is removed.
Allocating Licenses
Keep in mind that you can only allocate licenses to tenants at host level.
Note
This section only concerns enabled tenants which are to be licensed using a joint license, the host license. You cannot allocate licenses to a tenant which is using an individual license unless you first remove it.
From the Tenants Page
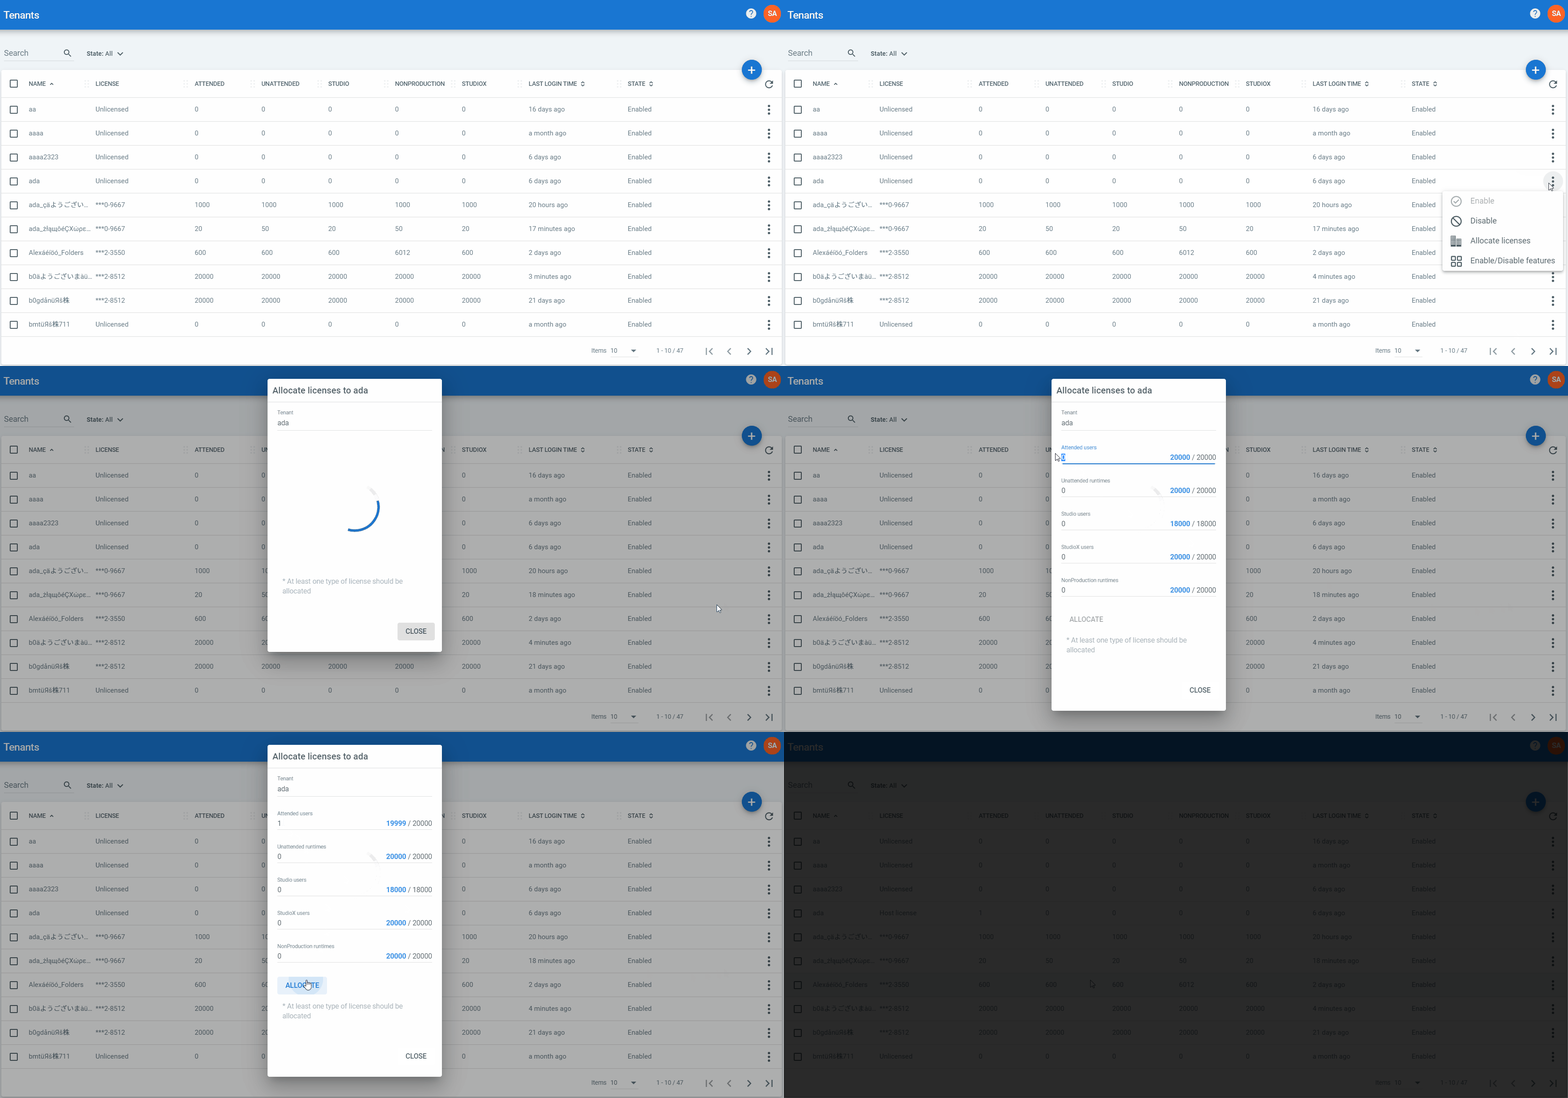
- In the Tenants page, click the More Actions button for a tenant and select Allocate Licenses. The Allocate Licenses page is displayed.
Note: If the tenant is licensed you must first remove the existing license before starting to allocate new ones. - At the end of each row you can see the number of available licenses (in blue) and their total number at host level. Allocate licenses as you wish, keeping in mind that you cannot exceed the total number available.
- Click Allocate. Observe that the Tenants page has been updated according to your changes. Take into account that the Allocate button is only enabled if you make some changes.
From the License Page
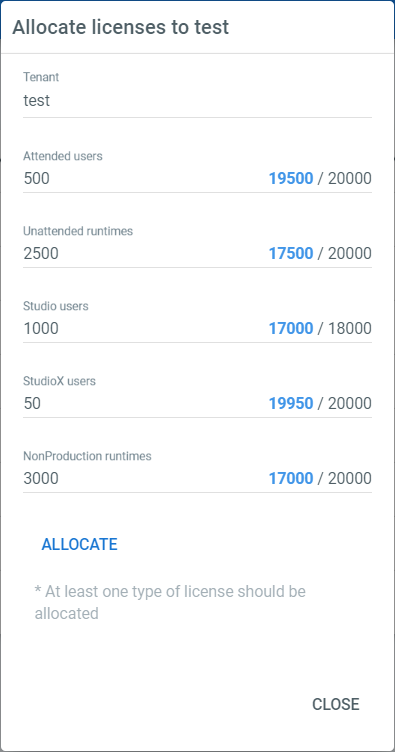
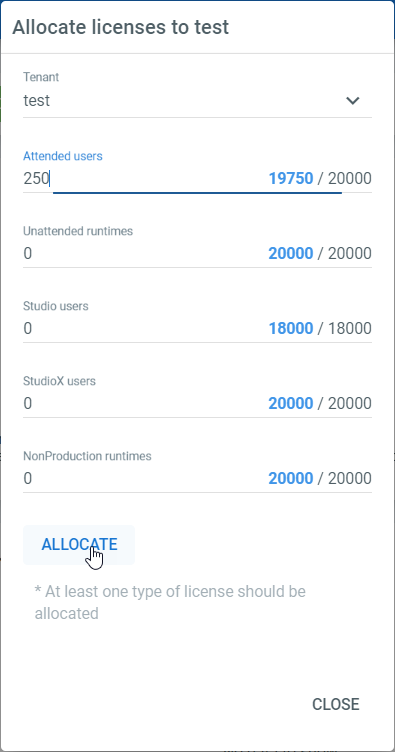
- Click Allocate. The Allocate Licenses window is displayed.
- Choose the desired tenant from the Tenants drop-down list or simply fill in its name.
- Allocate the Robot licenses as needed, as long as they are within the limit of each category, and click Allocate. Observe that the Allocate Licenses window is updated.
Removing Tenant Licenses
From the Tenants Page
Note
This page is only available at host level.
As this page represents a centralized location of all tenants, you can remove licenses for multiple of them.
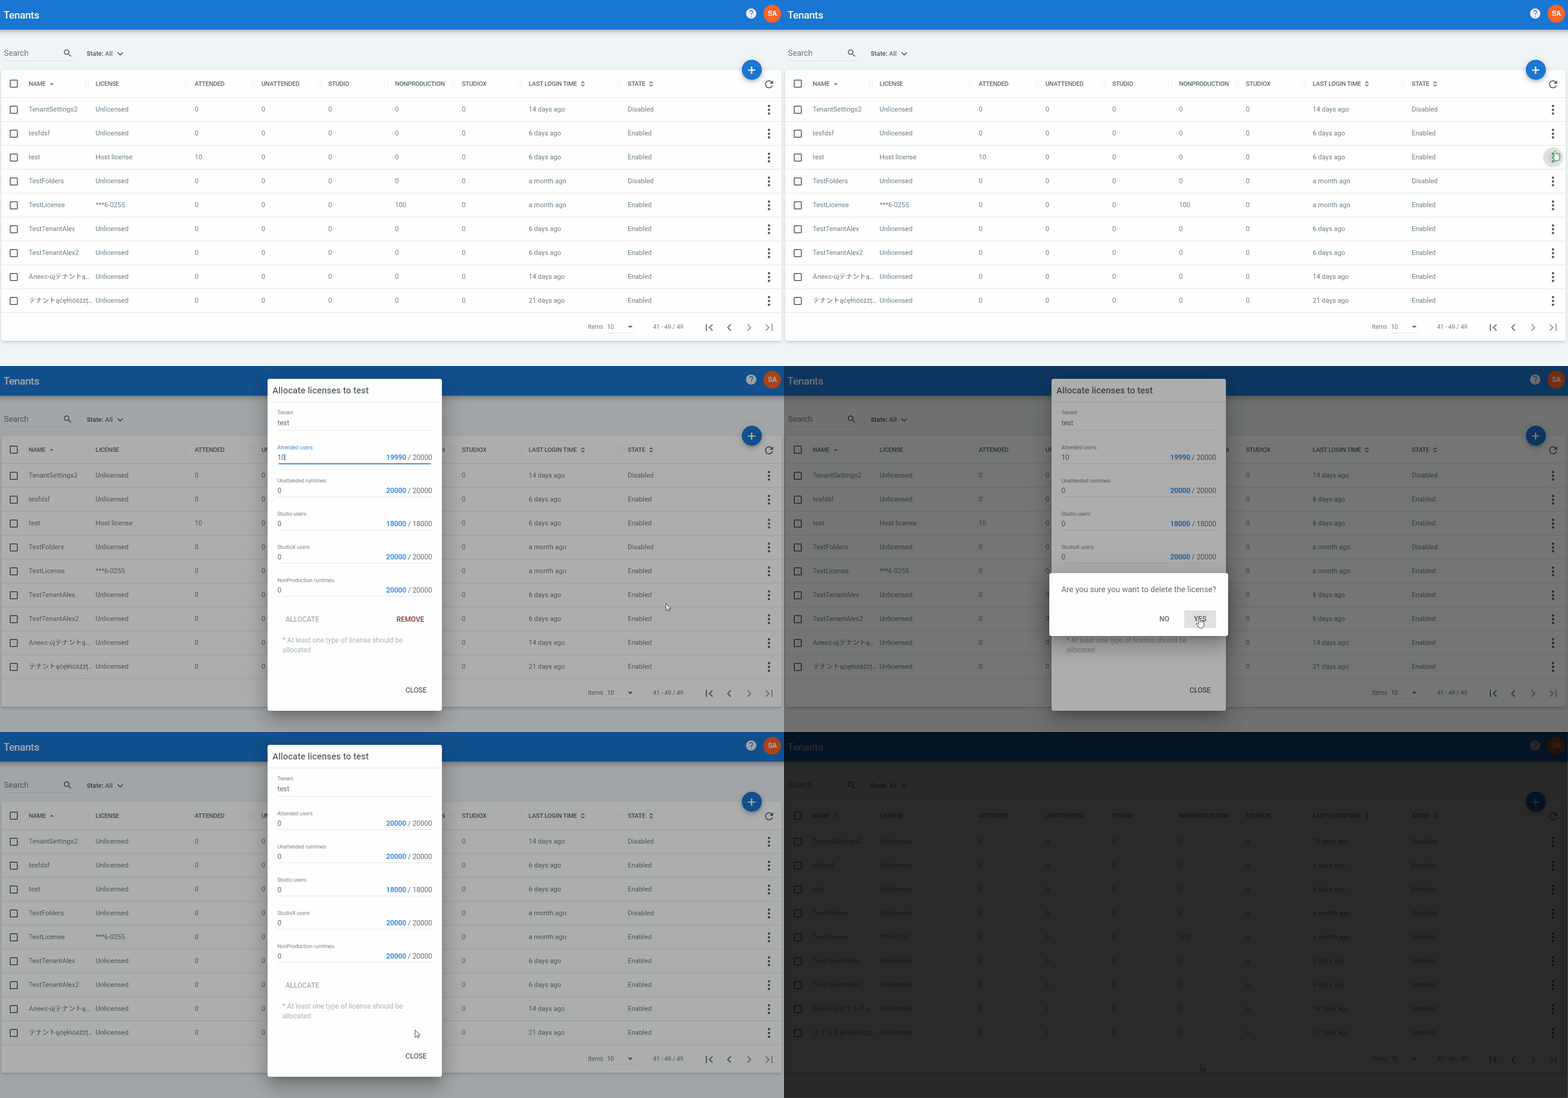
- In the Tenants page, click the More Actions button next to the desired tenant and select Allocate Licenses. The Allocate Licenses window is displayed.
- For deleting the license from the tenant, click Remove. Note that the Remove button is only displayed for already licensed tenants. Click Yes to confirm when prompted. The Allocate Licenses window is updated.
- Click Close. Observe that the Tenants page is updated as well, and on the License column, your tenant is displayed as Unlicensed.
From the License Page
At Tenant Level
- In the License page, click Remove. A dialog box is displayed, asking if you are sure you want to perform this action.
- Click Yes. Your license is deleted. Note that the License page is updated and your tenant is displayed as Unlicensed.
At Host Level
- Click Allocate. The Allocate Licenses window is displayed.
- Choose your tenant from the Tenants drop-down list or simply fill in the name of your tenant.
- Click Remove and then Yes when prompted. Note that the Allocate Licenses window is updated. Take into account that the Remove button is only displayed for licensed tenants.
Removing Your Host License
You can only remove the host license at host level.
- In the License page, click Remove. A dialog box is displayed, asking if you are sure you want to perform this action.
- Click Yes. Your license is deleted. Unlicensed is displayed as the License page is updated.
Info:
After removing the host license, all host licensed tenants become unlicensed.
Displaying License Details
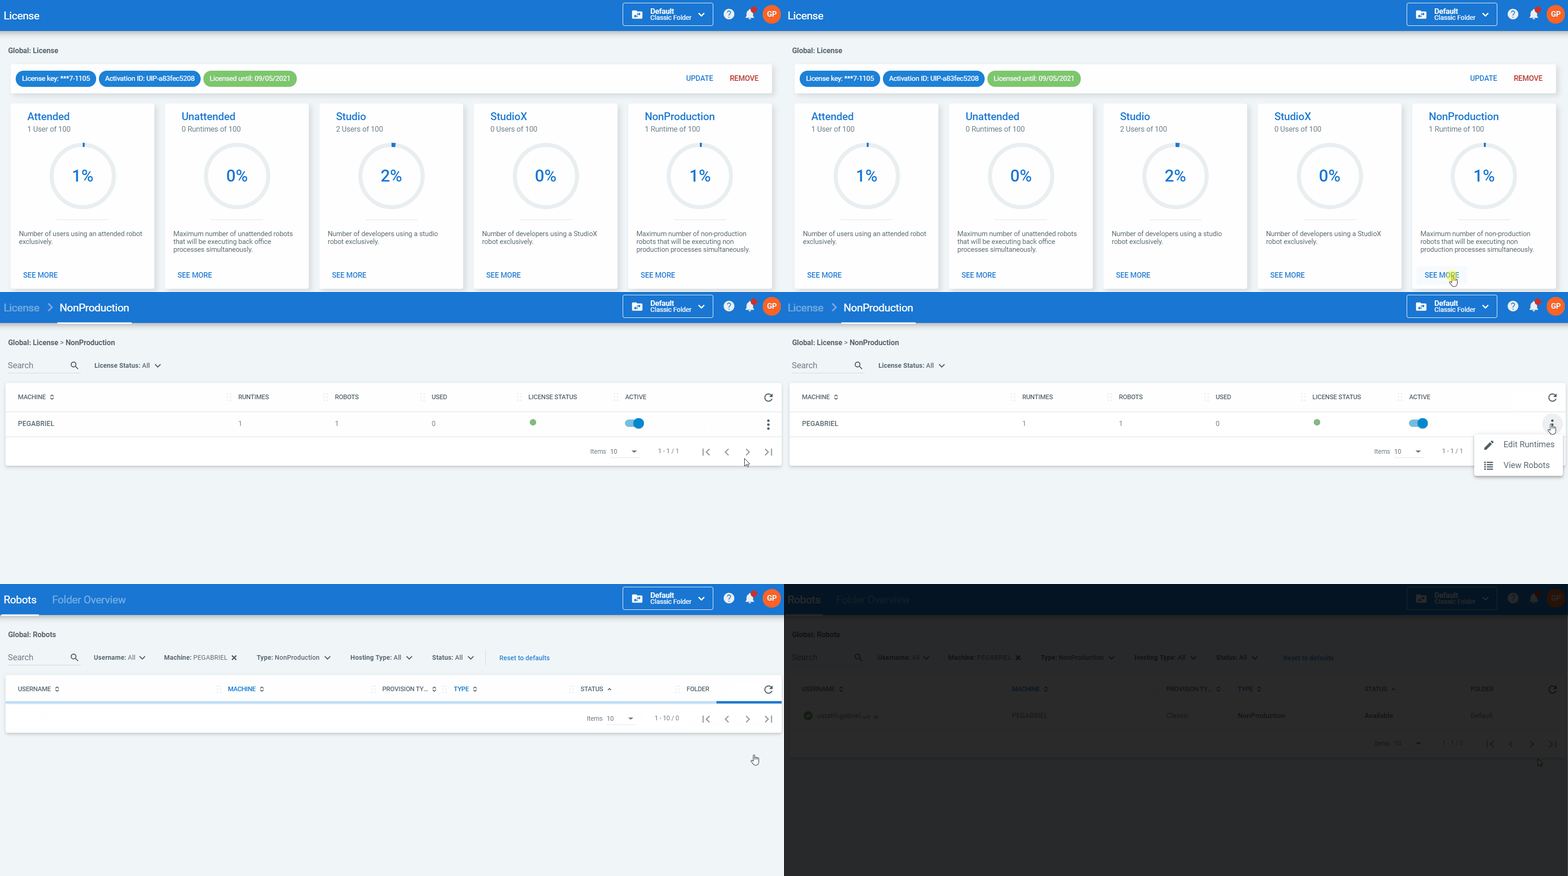
To view more information about how Robot licenses are consumed per type, click the corresponding See More button in the License page at tenant level. A page with the corresponding name is displayed:
Viewing Robots
It is possible to see all the Robots defined on a given machine for Unattended and NonProduction licenses, or with a specific user for Attended, Studio, and StudioX licenses. To display this information, perform the following steps:
- In the License page, click See More for the type of license that interests you. The corresponding page is displayed.
- Click the More Actions button next to a user or machine and select View Robots. The Robots page is displayed, filtered to display only the Robots that have the indicated user or machine.
Editing Runtimes
To edit the number of runtimes allocated to a machine:
- In the License page, click See More for the type of license that interests you. The corresponding page is displayed.
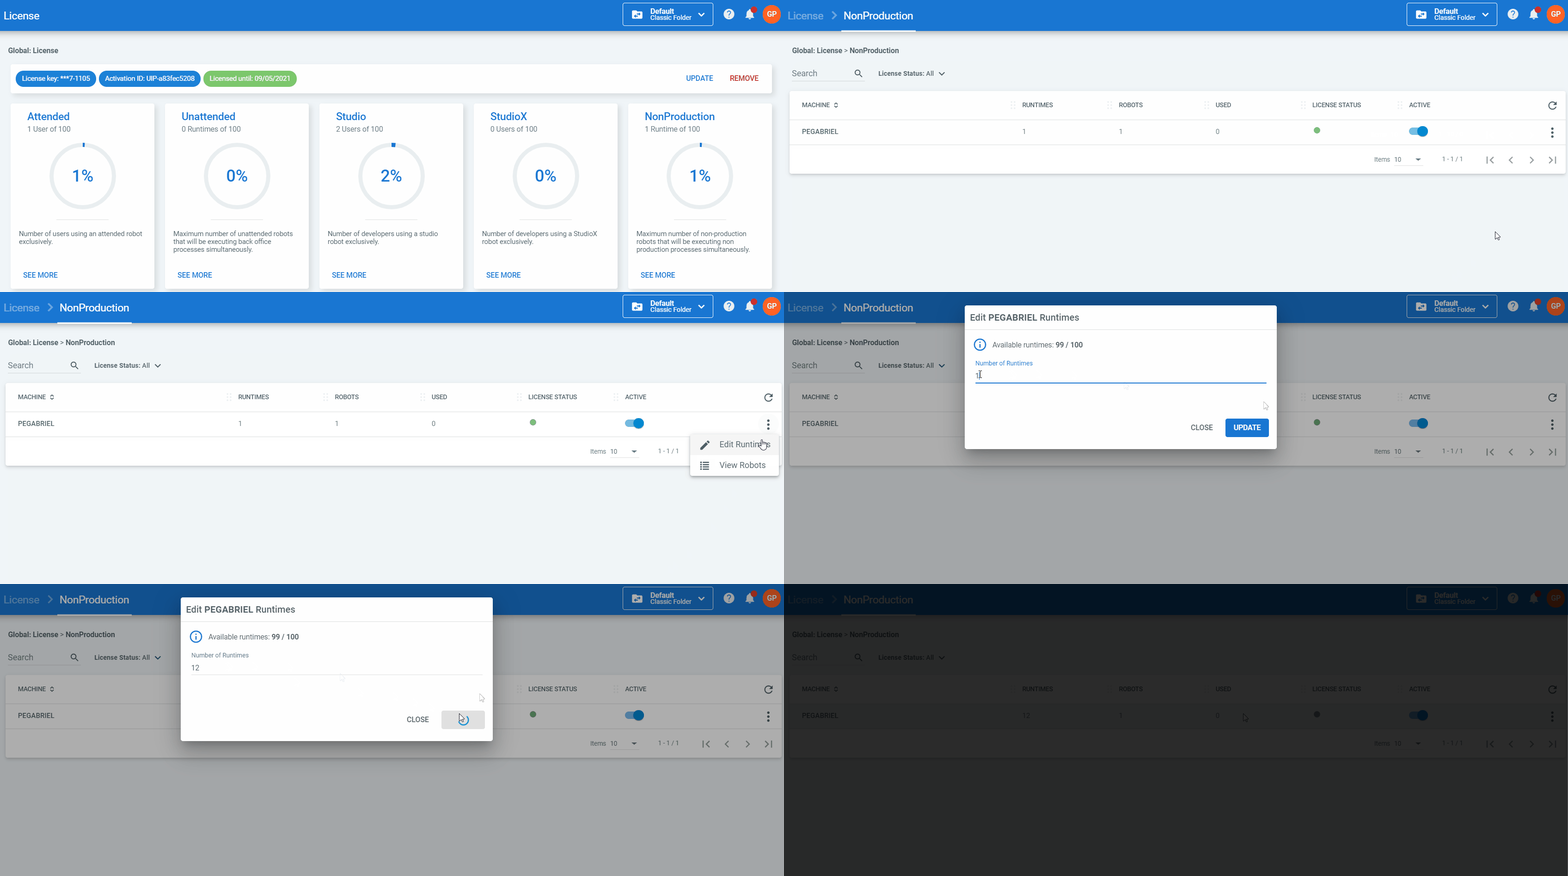
- Click the Edit Runtimes button for a machine. The Edit Machine Runtimes window is displayed.
- In the Number of Runtimes field input the number of processes that you want to be able to execute simultaneously on a specific machine.
- Click Update. The number of specified runtimes is allocated to that machine and you can start running jobs on it.
Enabling/Disabling a Machine
Only available for Unattended and NonProduction-purposed machines. Disable a machine to prevent instant license consumption. Enable a disabled machine in order to be able to use Studio and/or the Robot. More details here.
- In the License page, click See More for the type of license that interests you (Unattended or NonProduction). The corresponding page is displayed.
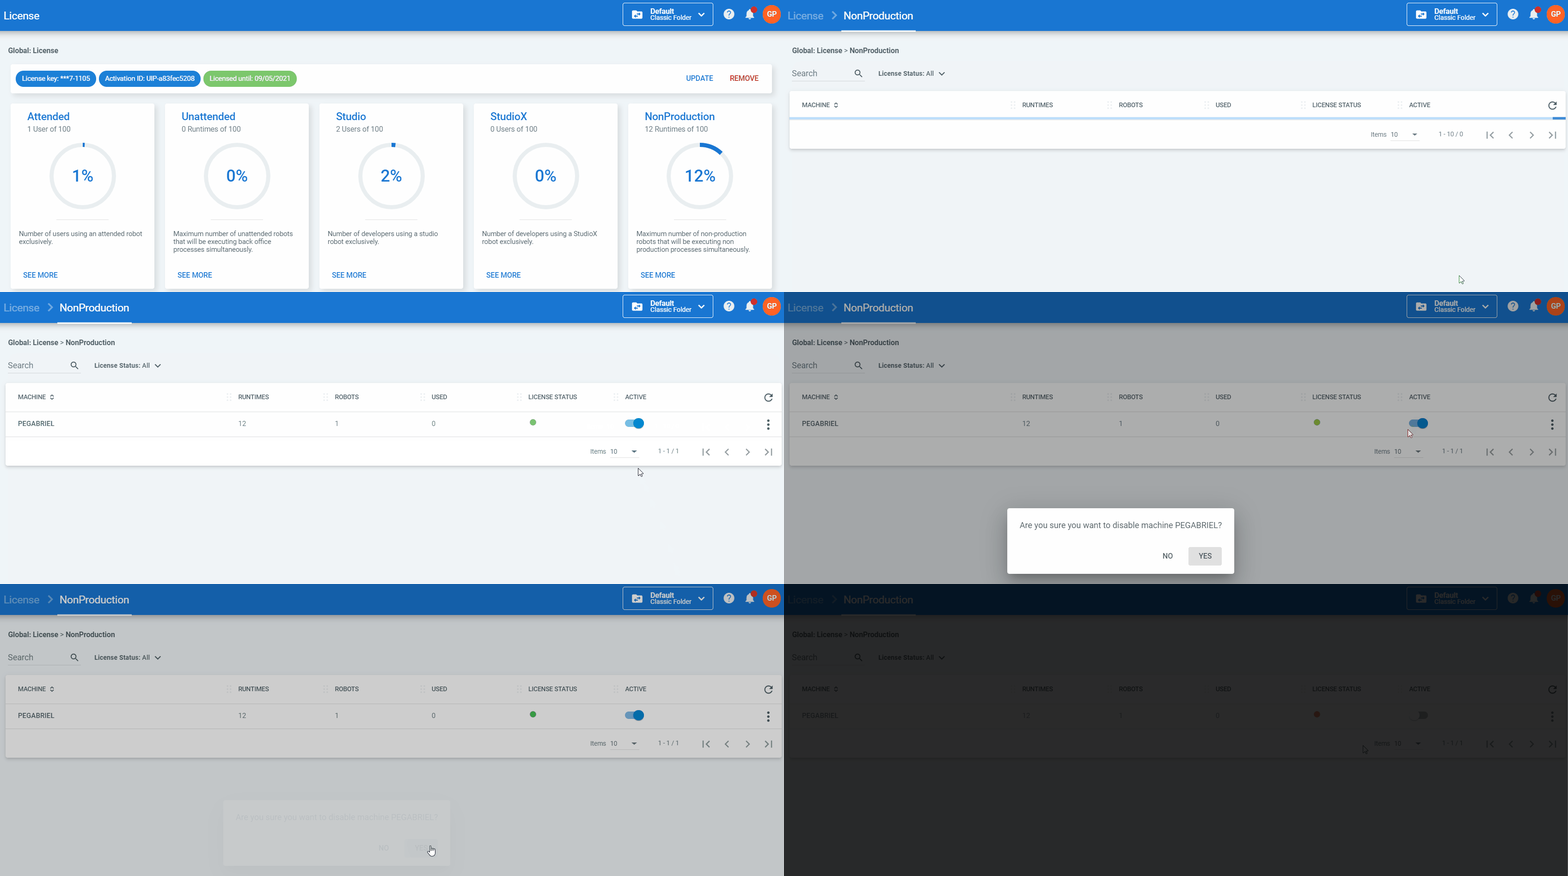
- Turn off the toggle in the Active column. A dialog is displayed asking for confirmation on disabling the machine.
- Click Yes. The machine is disabled.
- Turn on the toggle to enable the machine.
A disabled machine is displayed as stricken-through on the Robots page:
Keep in mind that you cannot disable a machine as long as Robots on that machine are still running.
Updated about a year ago
