The Triggers Page
| Field | Description |
|---|---|
| Search | Looks for triggers that match your input. You can search according to the trigger name, process and environment name. |
| State Filter | Enables you to filter the page according to the state of the trigger. The following options are available: All, Enabled, Disabled. |
| Type Filter | Enables you to filter the page according to the type of trigger. The following options are available: All, Time, Queue. |
| Reset to defaults | This button is displayed only if you made changes to any of the filters described above, and enables you to return to the default settings. Please note that this button also resets the number of items displayed per page. |
Add | Opens the Add Trigger window, which enables you to configure a new trigger. For more information, click here. |
| Name | The name of the trigger as it was filled in when it was created. The icon in front of the trigger's name illustrates the state and type of trigger as follows: An enabled time trigger is marked with the A disabled time trigger is marked with the An enabled queue trigger is marked with the A disabled queue trigger is marked with the |
| Process | The name of the process that has been scheduled to be executed. |
| Environment | The environment in which the trigger runs. It is associated to the process that gets executed by the trigger. |
| Type | The type of trigger. The following options are available: Queue, Time. |
| Trigger Details | For queue triggers, it displays the name of the queue which launches the trigger. For time triggers, it displays the time when the execution of the process is scheduled. The time is displayed according to the time zone you selected when creating the trigger. |
| Next Run Time | For queue triggers it is not applicable. N/A is displayed. For time triggers, it displays the amount of time until the next execution of the process. Hovering over this field displays the exact time and date. If the trigger is in a different timezone than the one configured per tenant, the difference is displayed in the tooltip. For triggers that have been disabled, Disabled is displayed instead. |
| Stop After | For queue triggers it is not applicable. N/A is displayed. For time triggers, it displays the amount of time to pass before the trigger stops. |
More Actions | Displays a menu with the following options: Edit - Opens the Edit Trigger window, which enables you to make changes to a trigger. View Jobs - Displays all the jobs started by the corresponding trigger in the Triggers > Jobs page. Edit Queue - Only displayed for queue triggers. Opens the Update Queue page for the queue associated to the trigger, and enables you to make changes to it, such as adding a JSON schema, or enabling SLA predictions.Enable - Enables the selected trigger. This option is available only if the selected trigger is disabled. Disable - Disables the selected trigger. This option is available only if the selected trigger is enabled. Remove - Removes the corresponding trigger. Triggers can be removed even if they are active. |
When selecting triggers, the Remove, Disable and Enable buttons are also available at the top of the page, instead of the Search and filtering options. This enables you to make bulk updates to your triggers.
The Add Trigger Window
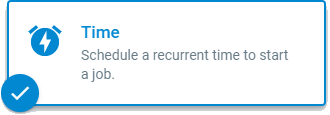
Time Trigger

| Field | Description |
|---|---|
| Name | Adds a custom name to your trigger, so that you can easily identify them. The name cannot exceed 255 characters. |
| Process | Displays a drop-down list of all the available processes and enables you to select the one that you want to schedule. |
| Execution Target tab | Execute the specified process according to the following options: All Robots - enables you to execute the targeted process on all the Robots from the indicated environment (the default option). Specific Robots - displays all the Robots in the environment assigned to the selected process, and enables you to manually select the ones to execute it. Allocate Dynamically - Displays a field in which you can specify how many times the selected process is to be executed. As soon as a Robot from the specified environment becomes available, it executes the process, taking into account the given trigger. |
| Parameters tab | Enables you to view and edit the value of input parameters. The value of an input parameter can be marked as follows: No value - No value was provided for the parameter, at a package and process level. Inherited from package - The value was provided by default in Studio. Inherited from process - The value was provided at process level (in the View Process window). If no In or In/Out arguments have been defined in Studio, the following message is displayed: Input parameters are not defined for this version. |
| Timezone | The timezone according to which the trigger is launched. By default, UTC is selected. The Non-working day restrictions option is disabled for triggers configured with a timezone different than the one set at tenant level (Settings page > General tab). A tenant without an explicitly defined timezone inherits it from the host. |
| Trigger Conditions | Define trigger conditions for process execution. Your process can be configured to trigger: every 1, 5, 10, 15 or 30 minutes; once every number of hours; on a daily, weekly or monthly basis at a specific hour; on selected weekdays at a specific hour; according to a custom cron expression. Orchestrator uses an open-source library to parse and display cron descriptions, which can be found here. The trigger is configured by default to be launched once every minute on all Robots, without a stop time. |
| Non-working days restrictions | Enables you to apply non-working days restrictions to your trigger according to a calendar configured beforehand. Details here. Please remember that this option is disabled for triggers configured with a timezone different than the one set at tenant level (Settings page > General tab). A tenant without an explicitly defined timezone inherits it from the host. |
| Stop Job after | Configure the trigger to stop after a specified amount of time, which can be expressed in days, hours and minutes. Note: The maximum accepted value for is 10 Days. Additionally, when you enable this option, you are required to select either Stop or Kill to establish if you want to stop or force stop the trigger. Kill is selected by default. Note: The amount of time indicated in the Stop After section elapses according to your specifications, even if the job is queued. For example, if you schedule a job to run at 1 p.m. and set it to stop after 20 minutes, at 1:20 p.m. the job stops even if it had stayed in a queue until 1:15 p.m., and then started. |
| Disable Trigger at | Enables you to set a date and time when the trigger gets automatically disabled. |
| Add | Creates the trigger with the selected configuration and saves it in the database. This button is available only if you filled in a name, selected a process, configured a trigger , and chosen the Robot(s) to execute it. |
| Cancel | Closes the Add Trigger window without saving your settings. |
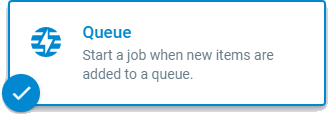
Queue Trigger

The queue trigger runs in the environment associated to the selected process.
| Field | Description |
|---|---|
| Name | Adds a custom name to your trigger, so that you can easily identify them. The name cannot exceed 255 characters. |
| Process | Displays a drop-down list of all the available processes and enables you to select the one that you want to schedule. |
| Parameters tab | Enables you to view and edit the value of input parameters. The value of an input parameter can be marked as follows: No value - No value was provided for the parameter, at a package and process level. Inherited from package - The value was provided by default in Studio. Inherited from process - The value was provided at process level (in the View Process window). If no 'In' or 'In/Out' arguments have been defined in Studio, the following message is displayed: Input parameters are not defined for this version. |
| Timezone | The timezone according to which the trigger is launched. By default, UTC is selected. The Non-working day restrictions option is disabled for triggers configured with a timezone different than the one set at tenant level (Settings page > General tab). A tenant without an explicitly defined timezone inherits it from the host. |
| Queue | Select the queue which fires the trigger, if new queue items are added into it. |
| Trigger Conditions | Define trigger conditions for process execution. Minimum number of items that trigger the first job - the item-processing job is only started after the targeted queue has at least this number of new items. Deferred queue items are not counted. Maximum number of pending and running jobs allowed simultaneously - the maximum number of allowed pending and running jobs, counted together. For 2 or more jobs allowed simultaneously, the third option needs to be defined as described below. Another job is triggered for each __ new item(s) - the number of new queue items (on top of the number configured for the Minimum number of items that trigger the first job option) to trigger a new job. |
| Non-working days restrictions | Enables you to apply non-working days restrictions to your trigger according to a calendar configured beforehand. Details here. Please remember that this option is disabled for triggers configured with a timezone different than the one set at tenant level (Settings page > General tab). A tenant without an explicitly defined timezone inherits it from the host. |
| Disable Trigger at | Enables you to set a date and time when the trigger gets automatically disabled. |
| Add | Creates the trigger with the selected configuration and saves it in the database. This button is available only if you filled in a name, selected a process, configured a trigger , and chosen the Robot(s) to execute it. |
| Cancel | Closes the Add Trigger window without saving your settings. |
Updated 2 years ago