Important!
Orchestrator does not support multiple sharded databases.
Installation of the High Availability Add-on (HAA) for your Orchestrator instance is performed by downloading and executing a provided script.
Before proceeding with your HAA installation be sure that you meet the Hardware and Software Requirements.
Notes:
- HAA requires a separate license from Orchestrator. Contact UiPath for details.
- Active/Active Disaster Recovery deployment models require two HAA licenses.
Installation
Note:
You must be the root user or have access to
sudoto the root user to install HAA. Additionally you must have user creation rights.
Due to how HAA manages and utilizes memory, it is recommended that you disable Swap prior to proceeding with installation.
- Disable
swapwith the command:sudo swapoff -a. - To persist this change through reboots, comment the
swapentry in theetc/fstabfile by running:sudo sed -i.bak '/ swap / s/^(.*)$/#1/g' /etc/fstab. - Repeat this process on all nodes where you are installing HAA.
Master Node
- Create the directory where HAA is to be downloaded and extracted, for example:
mkdir haa. - Change to the newly created directory using the command:
cd /<path-to>/haa/. - Download the installation script by running
wget http://download.uipath.com/haa/get-haa.sh. - Make the script executable by running
chmod +x get-haa.sh. - Install the master node with the following command:
sh get-haa.sh -u <email> -p <password>.
Provide the email and desired password for the account administrator.
Secondary Nodes
After you have installed the primary (master) node, from each additional node:
- Create the directory where HAA is to be downloaded and extracted, for example:
mkdir haa. - Change to the newly created directory using the command:
cd /<path-to>/haa/. - Download the installation script by running
wget http://download.uipath.com/haa/get-haa.sh. - Make the script executable by running
chmod +x get-haa.sh. - Install the node with the following command:
sh get-haa.sh -u <email> -p <password> -j <IP_address_of_the_master_node>.
Provide the email and password set when creating the master node, and the IP address of the primary node.
Script Parameters
The following parameters are available when running the HAA installation script:
| Parameter | Decription |
|---|---|
-u | The username of the HAA cluster administrator. For example -u documentation@uipath.com. |
-p | The password for the administration user, set when installing the primary node. For example -p SuperSecret_Password. |
-j | The IP address of the primary node. When provided, a secondary (slave) node is installed. For example -j 10.10.22.10. |
-h | Used to display the installation help guide. |
-l | The license code for your HAA cluster. |
Web.config Configuration
Web.config ConfigurationYou must configure Orchestrator to use HAA and add all HAA nodes to the Orchestrator web.config file using the LoadBalancer.UseRedis and LoadBalancer.Redis.ConnectionString parameters. For example:
<add key="LoadBalancer.UseRedis" value="true" />
<add key="LoadBalancer.Redis.ConnectionString" value="10.10.20.184:10000,10.10.24.148:10000,10.10.22.114:10000,password=SuperSecret_Password" />
Verifying the Cluster Installation
After you have installed all nodes of your HAA cluster, confirm the successful configuration as follows:
- Navigate your browser to the IP address of any HAA node on port
8443. For example:https://10.10.20.196:8443/. The HAA login page is displayed.

- Enter the username and password provided during the installation to login.
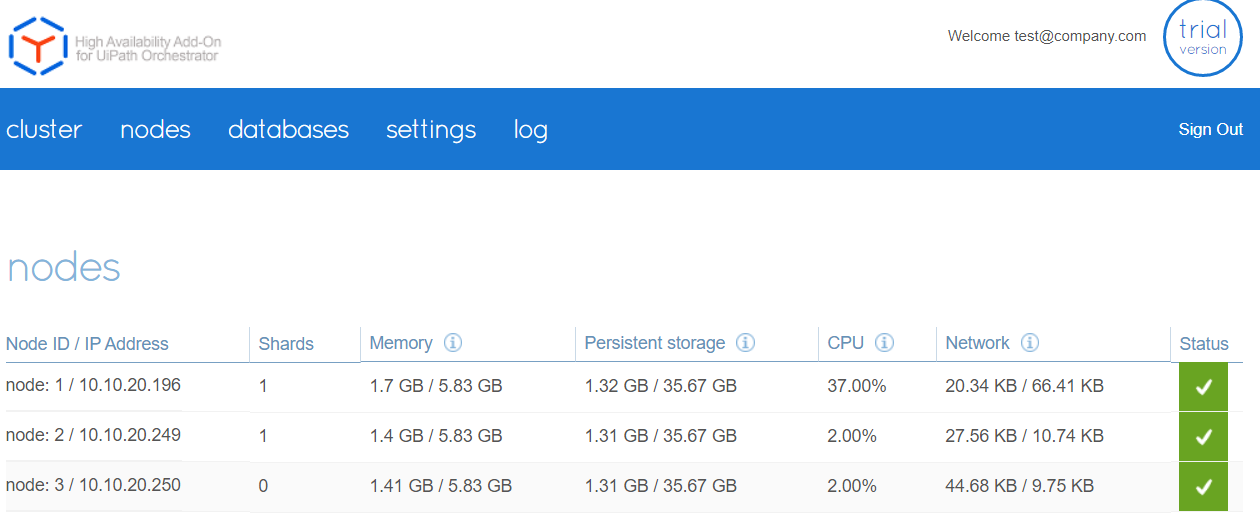
- Select the nodes tab and verify that all installed nodes appear here with a status of OK.

- Select the databases tab and confirm that the
uipath-orchestratordatabase appears here with a status of OK.
Note:
By default this database is created on port
10000with the password provided at installation.
Your HAA cluster is now ready, and you can proceed with the Orchestrator installation, as described here.
Updated 9 months ago