Important!
Adding directory users or groups requires enabled Windows Authentication in your Orchestrator instance.
Adding Users by Type
Directory
Note: Group configuration (roles, web login, robot settings) is passed-on to any directory user that belongs to that group, and is later on added or auto-provisioned.
- From the Users page, click the Add button and select Add Directory User or Group. The Add Directory User or Group window is displayed.
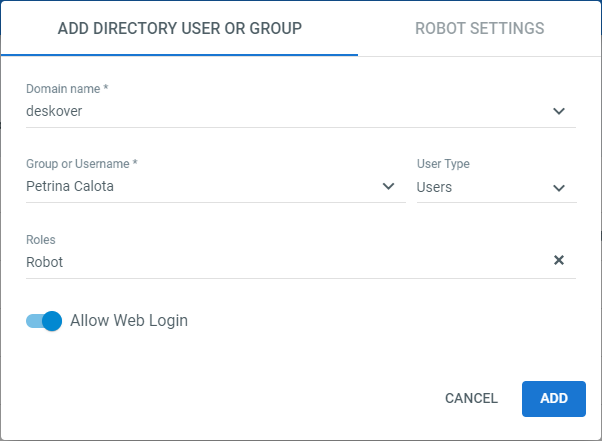
- Use the Domain name drop-down to select the Active Directory domain from where you want to add the user or group. All domains and subdomains from forests that are 2-way trusted with the domain specified in the
WindowsAuth.Domainparameter are available when adding directory users/groups. Please note that it can take up to an hour to update the domain list with newly added two-way trusted domains. - In the Group or Username field, enter the the Active Directory group or user you want to add. To refine the search results and improve the search performance in case of large deployments, it is recommended to select the user type from the User Type drop-down.
- From the Roles drop-down, select the role(s) for this group or user.
- Use the Allow Web Login toggle to select if this user/group is able to log into Orchestrator. The toggle is only displayed for tenants that have the Modern Folders option enabled.
- Click Add to finish the user provisioning or open the Robot Settings tab and follow the remaning steps below to configure robot creation for the user or group.
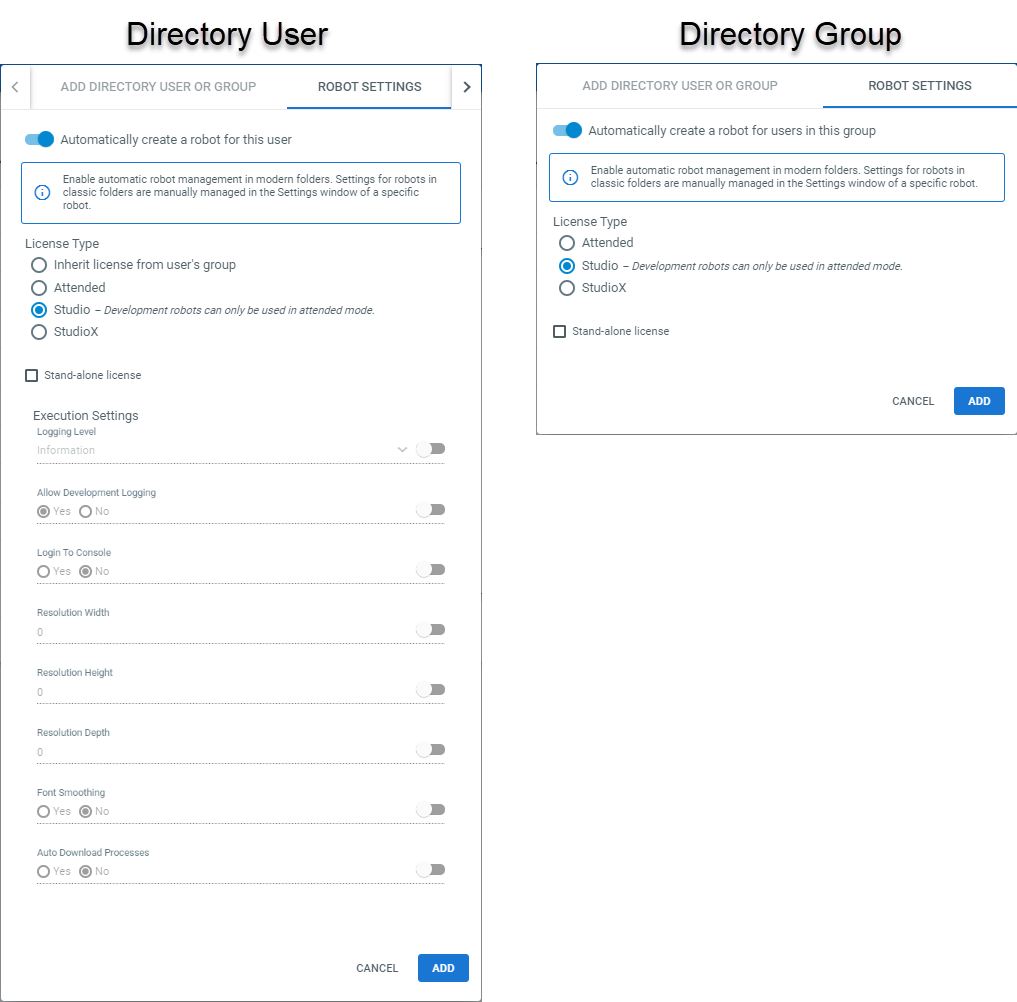
- Use the toggle to select whether to automatically create a robot for the directory user or directory group.
- If automatic robot provisioning is enabled, use the License Type radio buttons to select how the robots are licensed. Read about license types here.
- For Studio and StudioX licenses, select the Stand-alone license check box if the robots are licensed externally and not through Orchestrator.
- Configure execution settings for your Robots in the Execution Settings section.
Note: Execution settings can only be configured when adding users individually. Groups are added with the default execution settings. These are described here. To customize execution settings for directory users, you have to make the adjustments explicitly for them, once they have been auto-provisioned or added individually.
- Click Add. The user or user group is created and displayed in the Users page.
Local
- From the Users page, click the Add button and select Add Local User. The Add Local User window is displayed.
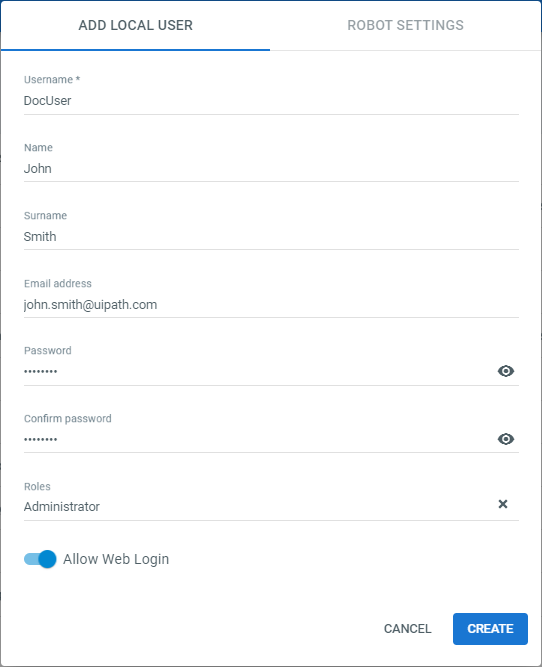
- In the Username field enter a name for the user.
- (Optional). In the Name field, enter the user's name.
- (Optional). In the Surname field, enter the user's surname.
- (Optional). In the Email field, enter the user's email address.
- (Optional). In the Password and Confirm Password fields, enter the password for this user. Note that it must be at least 8 characters in length and contain at least one lowercase letter and one number.
- From the Roles drop-down, select the role(s) you want to assign this user.
- Use the Allow Web Login toggle to select if this user is able to log into Orchestrator. The toggle is only displayed for tenants that have the Modern Folders option enabled.
- Use the Allow Basic Authentication toggle to select if this user is able to authenticate to Orchestrator using basic authentication. This toggle is only available if the
Auth.RestrictBasicAuthenticationsetting in yourweb.configfile is set totrue. See here for details. - Click Create to finish the user creation or open the Robot Settings tab and follow the remaning steps below to configure robot creation for this user.
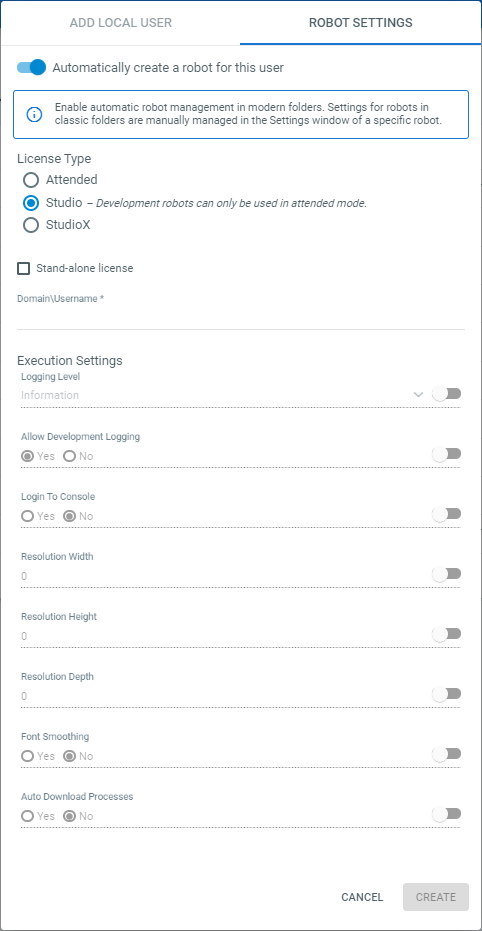
- Use the toggle to select whether to Automatically create a robot for this user.
- Use the License Type radio buttons to select how the robot is licensed. Read about license types here.
- For Studio and StudioX licenses, select the Stand-alone license check box if the robot is licensed externally and not through Orchestrator.
- Enter the Domain\Username of the robot associated to that specific local user.
- (Optional). Configure the robot Execution Settings. Learn more about these settings here.
- Click Create. The user is created and is displayed in the Users page.
Editing a User
To edit a user entity (be it a local user, a directory user, or a directory group), click the corresponding More Actions button in the Users page, and then Edit. Make the desired changes and click Update.
Checking User Permissions
To check the permissions of a user entity (be it a local user, a directory user, or a directory group), do the following:
- Click the More Actions button corresponding to the desired user entity in the Users page.
- Click Check Permissions.
- The User Permissions window is displayed. Each permission is listed on a per folder basis. Adjacent to each permission you can see whether it has been explicitly assigned or it inherited from the tenant.

If you are using an Azure AD guest user account, the role information that is displayed may not be accurate.
Removing a User
To remove a user entity (be it a local user, a directory user, or a directory group), click the corresponding More Actions button in the Users page, and then Remove.
Alternatively, select one or multiple users, and click the Remove button.
Important!
You cannot delete a user having the Administrator role.
![]() Updated 3 days ago
Updated 3 days ago
See Also
| About Users |
| About Roles |