Self-signed certificates are a way to secure your data by encrypting the SAML response when using single-sign on authentication. Below you can find an example of generating and using self-signed certificates in OKTA.
Generating a Self-Signed Certificate
There are multiple software applications which allow you to generate self-signed certificates, such as OpenSSL, MakeCert, IIS, Pluralsight or SelfSSL. For this example, we use MakeCert. In order to make a self-signed certificate with a private key, run the following commands from the Command Prompt:
makecert -r -pe -n “CN=UiPath” -e 01/01/2019 -sky exchange -sv makecert.pvk makecert.cerC:\Program Files (x86)\Microsoft SDKs\Windows\v7.1A\Bin\pvk2pfx.exe” -pvk makecert.pvk -spc makecert.cer -pfx makecert.pfx
Add the Certificate to OKTA
- Login to OKTA. The following setup is made in Classic UI view. You can change it from the drop-down on the top-right corner of the window.

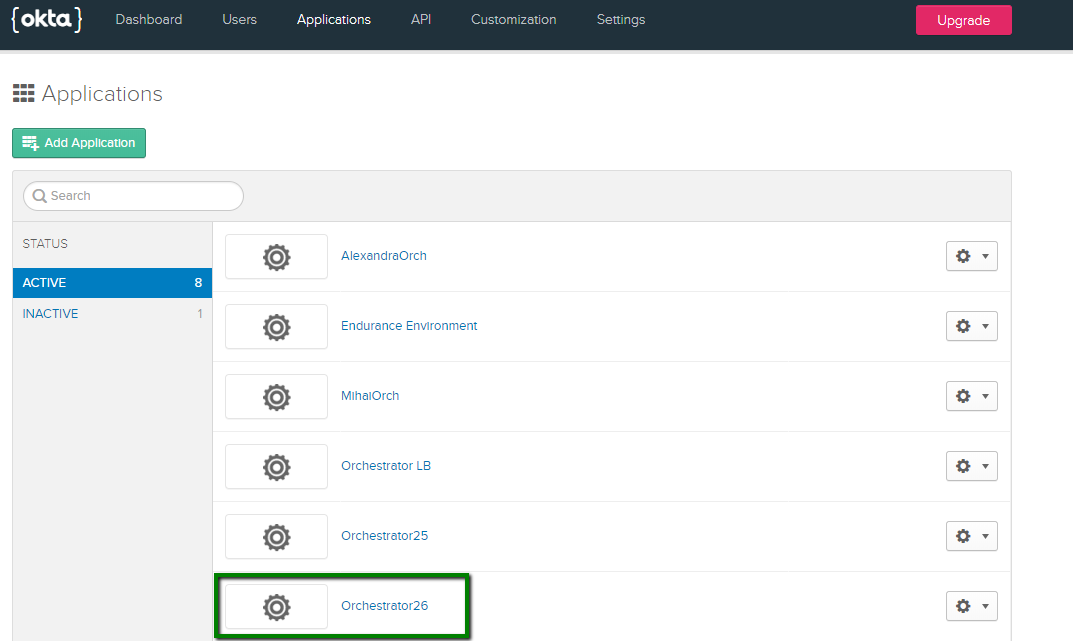
- On the Application tab, select your previously defined application.

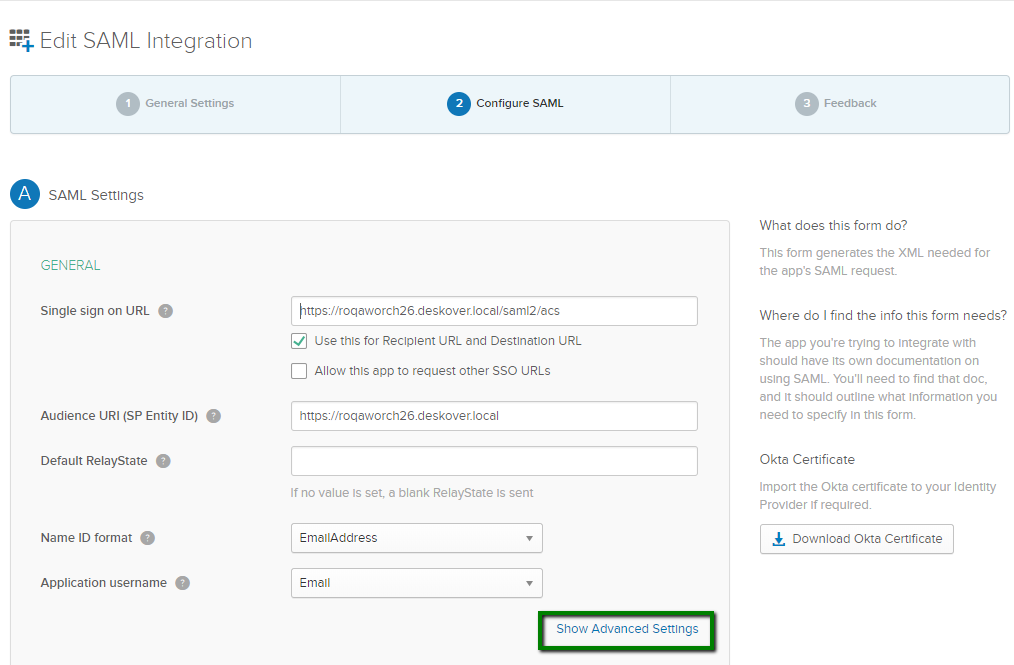
- On the General tab, in the SAML Settings section, click Edit.
- On the Configure SAML tab, click Show Advanced Settings.

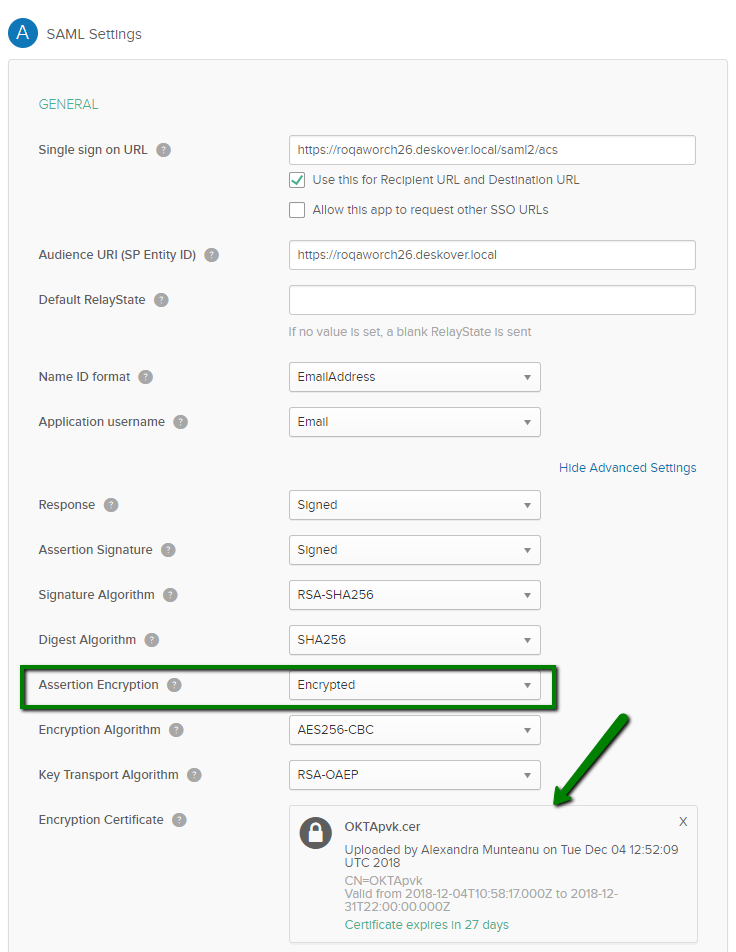
- For the Assertion Encryption drop-down, select the Encrypted option.
- The certificate is displayed in the Encryption Certificate field.

Set Orchestrator to Use the Certificate
- Import the makecert.pfx certificate to the Windows certificate store using Microsoft Management Console. See here how to do that.
- Make sure that the following configuration block is present in the
web.configfile:
<sustainsys.saml2 >
     <serviceCertificates>
     <add storeName="My" storeLocation="LocalMachine" x509FindType="FindByThumbprint" findValue="b1a437dfd2678037758c3cc04f387a8a666b765f"/>
     </serviceCertificates>
</sustainsys.saml2>
- Set the
findValueattribute of thesigningCertificateparameter to the thumbprint of the certificate, as provided in the Windows certificate store. Details here.
Updated 2 years ago