To configure your gmail account for IMAP/POP3 protocols in Gmail and be able to use your Gmail account in creating automations, you must follow these steps:
- Enable POP3/IMAP from Gmail.
- Generate and use a Google app password (optional).
Enabling POP3/IMAP from Gmail
Go to https://mail.google.com and log in with the email you want to use in your automation.
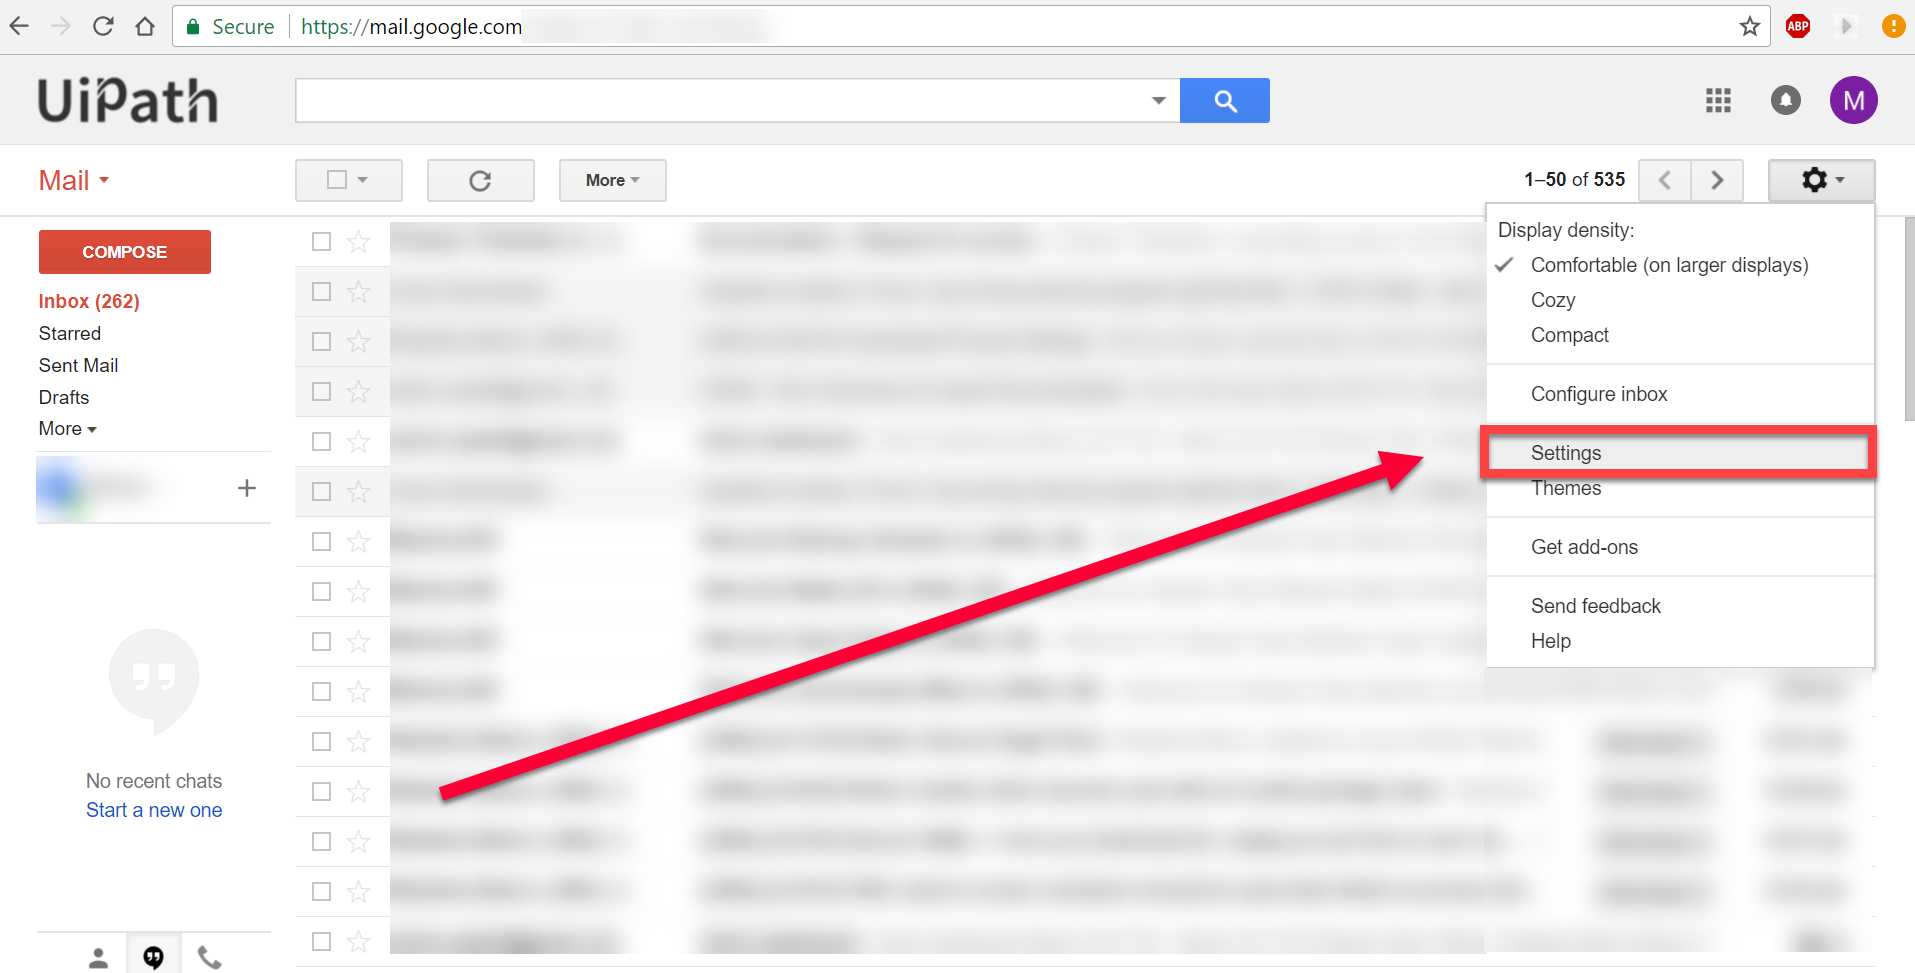
- Click Settings > Settings. The Settings page is opened.

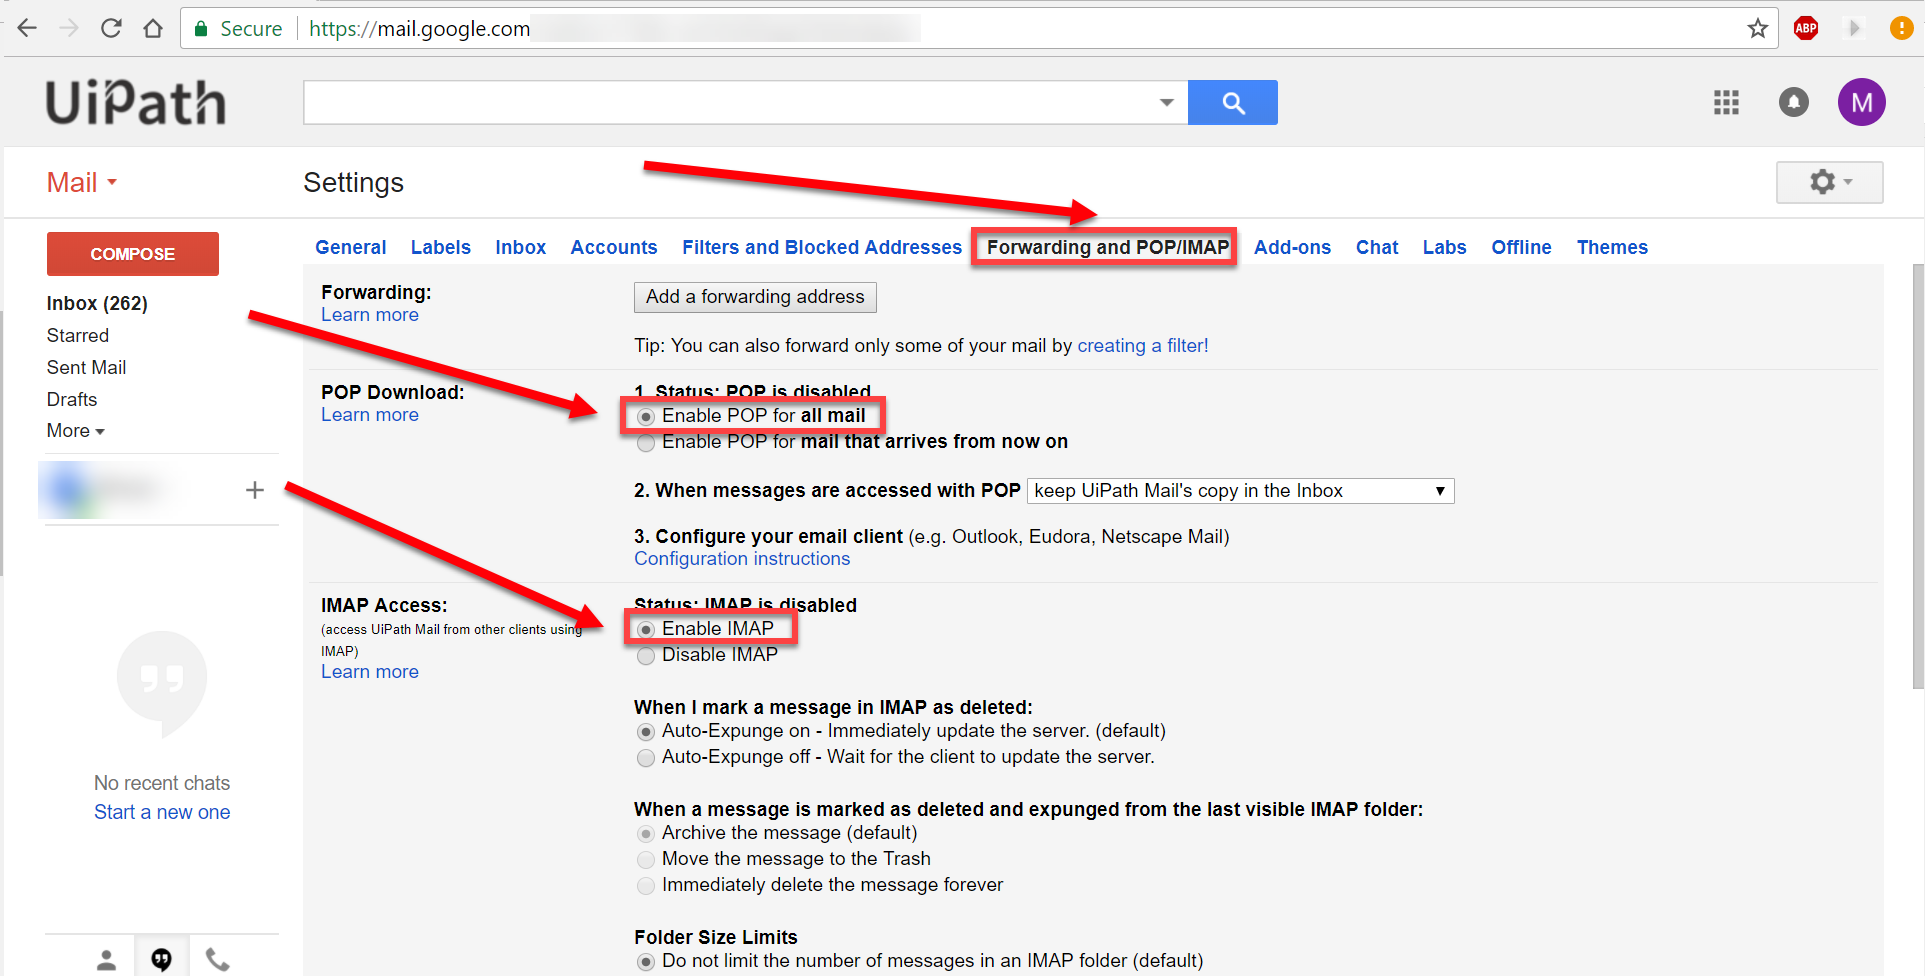
- In the Forwarding and POP/IMAP tab, select the Enable POP and Enable IMAP check boxes.

Generate and Use an App Password from Google
Note:
This only works if you have 2-step verification enabled for your email account.
- Go to https://security.google.com/settings/security/apppasswords.
- From the Select app drop-down select Other (Custom Name). A text box (Custom Name) is displayed.
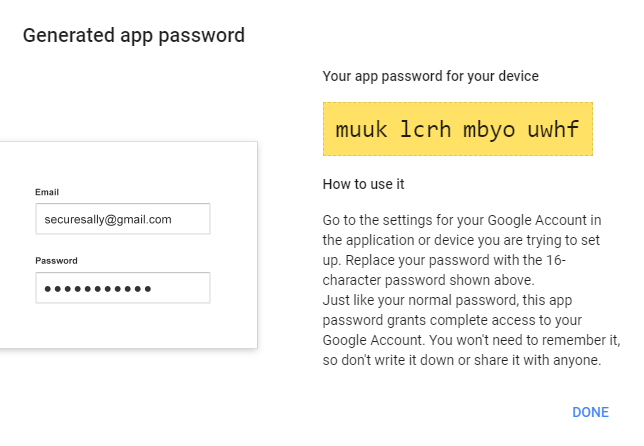
- Fill in the text box with a custom app name, such as UiPath, and click Generate. A 16-character password is generated that can be used in UiPath Studio instead of the original password.

Note:
The password is only displayed once. This method makes your automation more secure, and keeps your Gmail account protected.
For more information on how to work with POP3 and IMAP email messages in Studio, see the Get POP3 Mail Message and Get IMAP Mail Messages activities.
For more info on Gmail configuration go to this link.
Updated 3 years ago