The Break activity enables you to stop the loop at a chosen point, and then continues with the next activity.
Note:
The Break activity can only be used within the For Each activity.
Example of Using a Break Activity
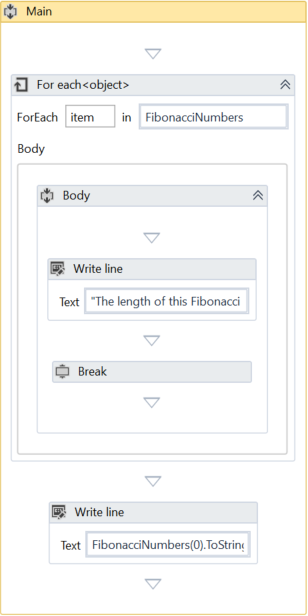
To exemplify how to use the Break activity we are going to build upon the project created for The For Each Activity. This new project writes only the first iteration of the loop and a few elements of the array to the Output panel.
- In the Body of the For Each activity, under the Write Line, add a Break activity.
- Under the For Each, add a new Write Line activity.
- In the Text field, type
FibonacciNumbers(0).ToString+ " " +FibonacciNumbers(2).ToString+ " " +FibonacciNumbers(4).ToString+ " " +FibonacciNumbers(6).ToString+ " " +FibonacciNumbers(8).ToString+ " " +FibonacciNumbers(10).ToString+ " ". This means that only the indicated elements of the array are going to be written to the Output panel.
The final project should look as in the following screenshot.

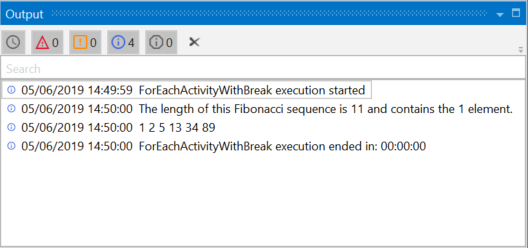
- Press F5. The automation is executed. Note that the Output panel only displays the first iteration of the loop and the specified array elements from the Write Line activity.

Updated 3 years ago
See Also
| About Control Flow |