The Delay activity enables you to pause the automation for a custom period of time (in the hh:mm:ss format). This activity proves itself quite useful in projects that require good timing, such as waiting for a specific application to start or waiting for some information to be processed so that you can use it in another activity.
Example of Using the Delay Activity
To exemplify how you can best use the Delay activity, let's create an automation that writes two messages to the Output panel, with a delay of 20 seconds between them.
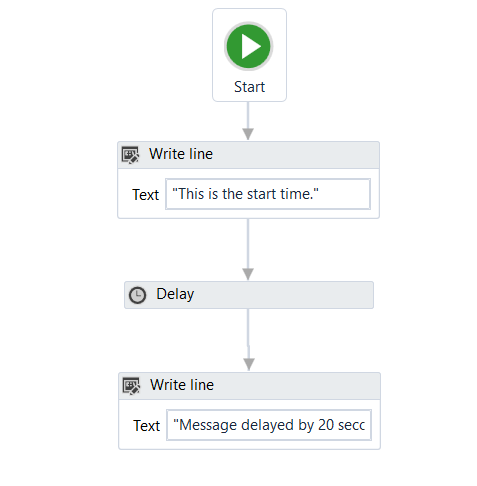
- Create a new flowchart.
- Add a Write Line activity and connect it to the Start node.
- Select the activity, and in the Text field, type "This is the start time."
- Add a Delay activity and connect it to the previously added activity.
- Select the activity, and in the Properties panel, in the Duration field, type 00:00:20. This is the 20 seconds delay that is going to be between the two logged messages.
- Add another Write Line activity and connect it to the previously added activity.
- In the Text field, type "Message delayed by 20 seconds.".
The final project should look as in the following screenshot.

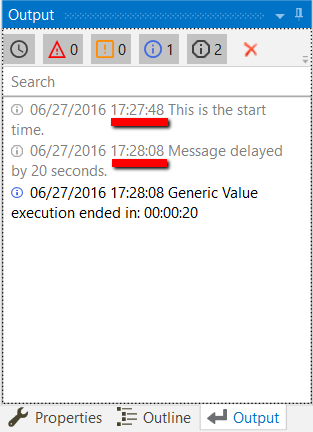
- Press F5. The automation is executed. Note that, in the Output panel, the two messages added in the Write Line activities are written twenty seconds apart.

Updated 3 years ago
See Also
| About Control Flow |