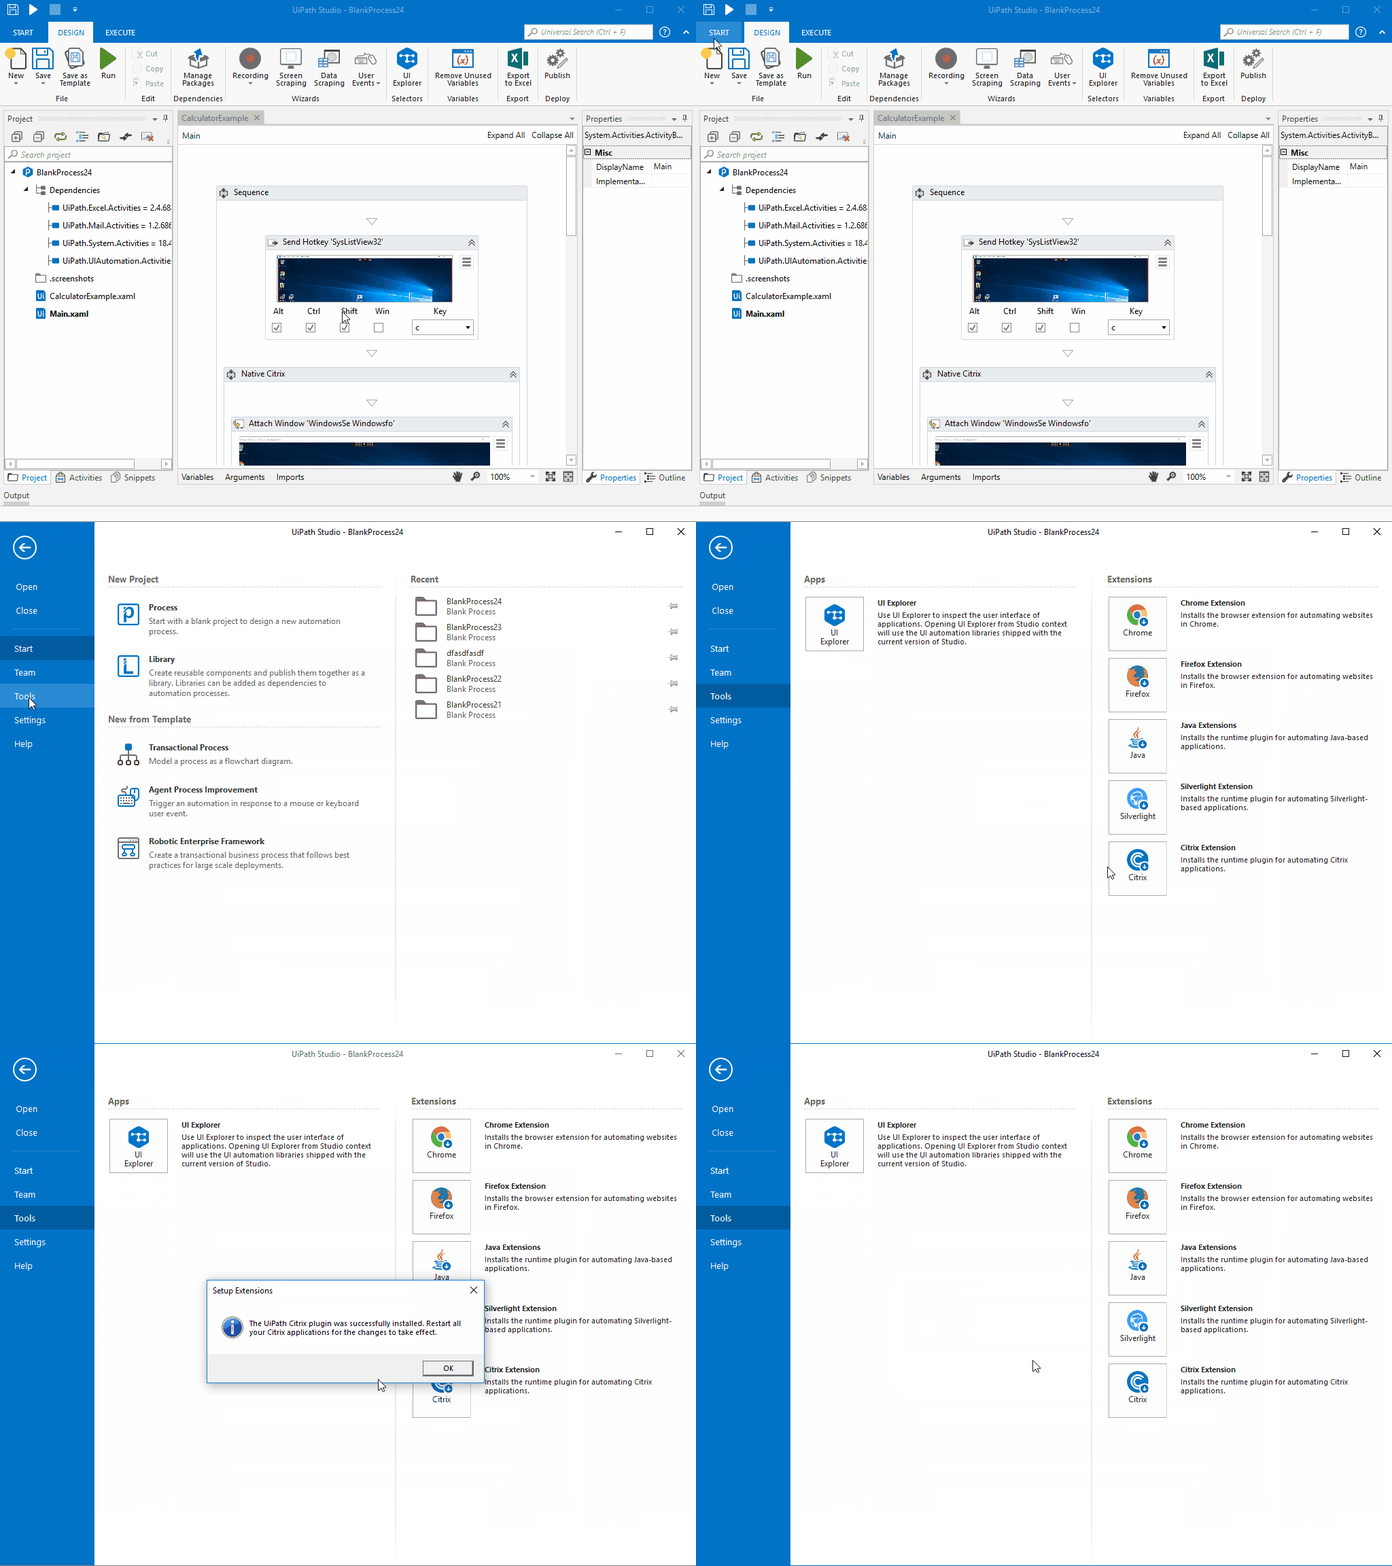
By installing the UiPath Extension for Citrix you are capable of automating Citrix Apps natively. It can be installed from Studio or the Command Prompt.
From UiPath Studio
- Access the Tools page from the Studio Backstage View. The extensions you can install become visible.
- Click the Citrix button. A confirmation dialog box is displayed.
- Restart all your Citrix applications for the changes to take effect. The UiPath Extension for Citrix is now installed.

From the Command Prompt
- Click the Windows Start button and type
cmdin the search field. - Right click on Command Prompt and run it as administrator.
- Change the directory to the UiPath installation folder (
cd C:\Program Files (x86)\UiPath\Studio\UiPath). - Use the
SetupExtensions /CitrixClientcommand to install the extension. A confirmation dialog box is displayed. - Restart all your Citrix applications for the changes to take effect. The UiPath Extension for Citrix is now installed.
Note:
To generate native selectors for Citrix technologie, you also need to deploy the UiPath Remote Runtime component on all your Citrix Application servers, as explained on this page. The
UiPathRemoteRuntime.msiinstaller is obtained by requesting it here.
Uninstalling the UiPath Extension for Citrix
- Close all your running Citrix Apps.
- Click the Windows Start button and type
cmdin the search field. - Right-click on Command Prompt and run it as administrator.
- Change the directory to the UiPath installation folder (
cd C:\Program Files (x86)\UiPath\Studio\UiPathfor Enterprise,cd %LocalAppData%\UiPath\app-19.x.x\UiPath\SetupExtensions.exefor Community). - Use the
SetupExtensions /CitrixClient /uninstallcommand to uninstall the extension. A confirmation dialog box is displayed.
The UiPath Extension for Citrix is now uninstalled.
Updated 3 years ago